Setting Up the Fuse1 (and Sift1)
v0.1, SolidPrint, Ger Walsh - June 2022
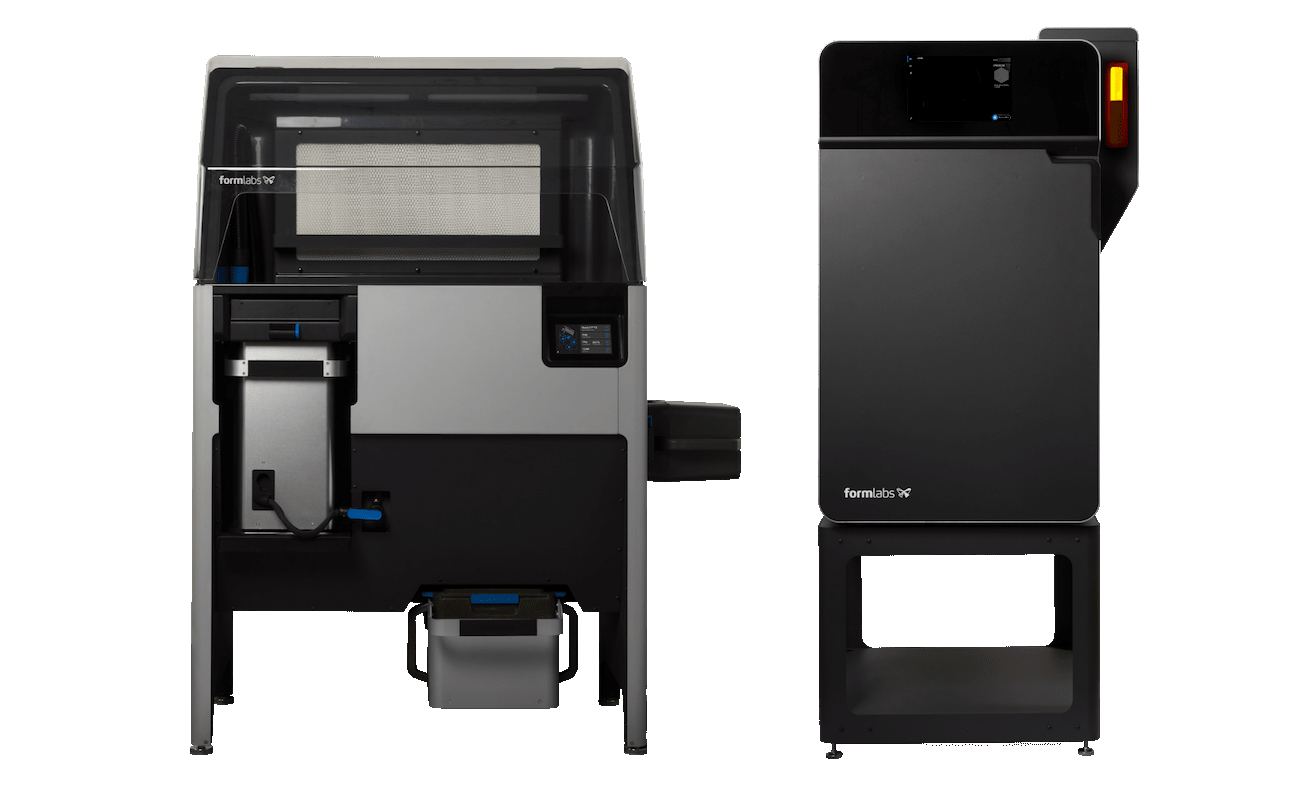
Fuse1 (right) and Sift1 (left)
SLS is a move involved process than FDM and SLA that you might have done before. Setting up the print involves a number of main steps as follows:
- Preparing Material:
- Preparing the printer and priming it for printing.
- Uploading from PreForm
- After the print, (re)moving the print chamber, taking out and finishing the prints, recovering the powder with the Sift1 unit.
But before that(!), Health and Safety and Setting up the workspace.
Health and Safety
The Nylon12 material is not recognised as hazardous (Safety Data Sheet), however, it is a very fine powder that tends to get everywhere. You should wear:
- gloves (Nitrile Pre-powdered Gloves) at all times during prep and finishing,
- dust mask (FFP2 minimum) at all times during prep and finishing,
- lab coat or apron to protect your clothes
- Heat-protective gloves when handling the print container - keep an eye on the temperature indicator on the screen! Do not open before it cools below 60ºC and do not proceed with taking parts out until it cools below 30ºC.
You may clean parts with water at the end. Do not pour down the sink, leave evaporate and dispose of the sediment. We tried cleaning with an Ultrasonic cleaner. Plain water was advised.
During the Spinning step, the material transfer container is not guarded, but it has torq-sensing motors and stops on resistance.
The plate in the print container is only ever manually operated with the Sift1 controls. The plate moves very slowly.
Adding New Powder
When preparing material for the machine, new material is always required in the mix. However it can be blended with old material up to a ratio of 30:70 (new:old).
Remove the rubber bung in the Sift1, pour the powder. Invert the container completely and fit into the opening to ensure powder doesn't escape.
* With a new box of material, it is needed to scan the new material card.
Blending old and new Powder
This is done automatically by the machine. The machine has two resevoirs, one for old; one for new. Use the control panel, as follows, to set the desired volume (L), and the ratio (%).
Put the Transfer Container in position in the shelf underneath. Slide open the lid (blue handle) and press Fill.
If you do not have enough old powder in the machine (eg. when we first received the machine there was none), you will get an error, and can choose to abort the process at that point.
Mixing/spinning with the Sift1
Load the Transfer Container in the Spinner at the side of the Sift1 unit. Start it from the control panel. It takes 10 mins.
Transferring to the Hopper in the Fuse1 unit
When the Spinner has finished, slide the lid of the Transfer Container closed. Lift it across, and invert it in position on top of the Hopper. Make sure it forms a good seal with the Hopper before sliding the lid open again.
Leave it in place for a while to allow the dust to settle.
Preparing the printer and priming it for printing
Power on the Fuse1. Slide the button, where it says Slide to Open....
To remove the Print Chamber unit, remove the connector and put in the holder of the Print Chamber unit, press the blue clip and lift the latch. Slide out and put to one side.
Each time the printer is used, it is necessary to:
- Clean the IR sensor with the Ethanol and one of the cleaning pads.
- Inspect the Optical Cassette for smudges and dirt. Both windows should be cleaned with Alcanox.
- Vacuum loose powder below the Print Chamber, and if there is some on the bracket below the roller section.
Important: Ask one of the Fab Lab team to do this part for you until you can do it yourself. Ask them to check for you.
To put the Print Chamber in place, press the blue clip to lift the latch again and slide it into the machine. Take the connector from the holder on the Chamber and insert into the Fuse. Insert firmly until it clips in place.
Close the door gently and use the hand recesses on the side to make sure the lock is engaged.
Press Prime Printer on the touchscreen.
Confirm the steps above, or follow the guide now to do any you have missed.
Next...
It is now ready to continue with PreForm.
To finish the process, the remaining steps are:
- remove the print chamber,
- take out and finishing the printed parts,
- recover remaining powder with the Sift1 unit.
Follow the details over on the SLS Finishing page.