Trotec Speedy400
v0.1 by Ger Walsh - first uploaded February 2020
updated by a "nervous first time user" (May 2023)
This guide is for the Trotec Speedy400, a professional 80 watt CO2 machine, with many features that offer a high-quality finish, including processing raster engravings, and optional attachments like automatic material loaders, rotary tools for glassware etc. and definitions up to 1000 dpi.
Steps
- 1. Setting up the Laser, preparing material
- 2a. Sending from Adobe Illustrator
- 2b. Sending from Adobe Illustrator
- 3. Sending via JobControl
1. Setting up the machine, preparing material
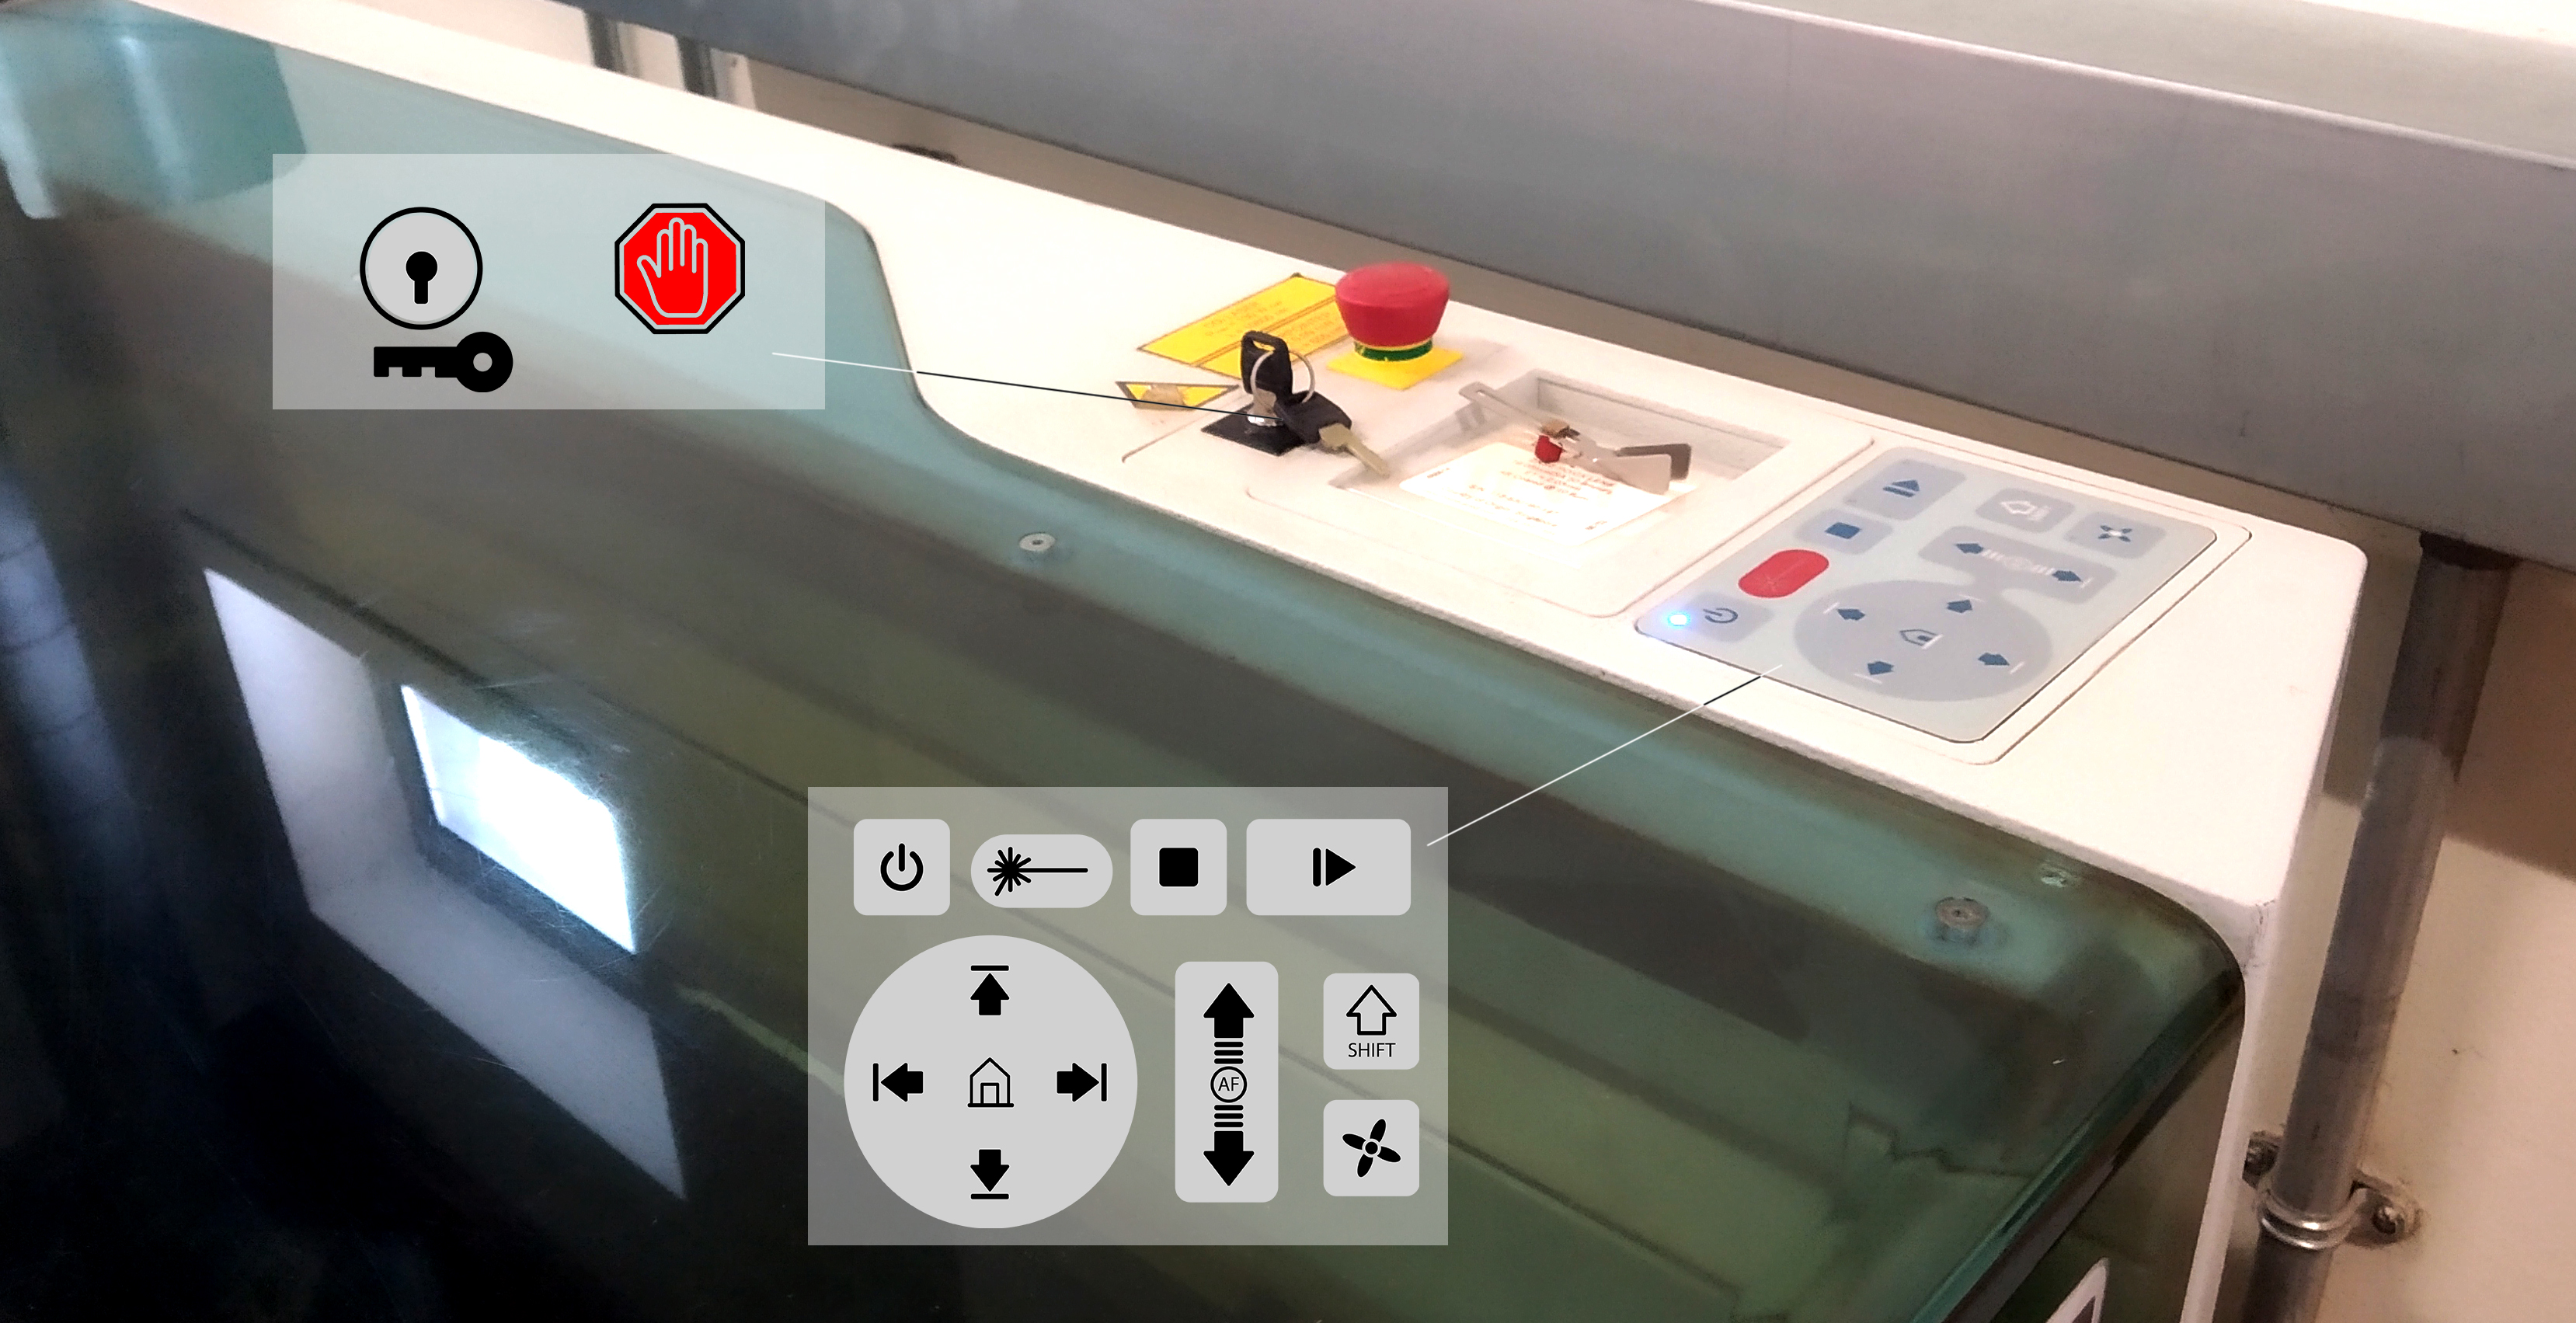
Power on the machine using the key located on the control panel of the machine. Turn this gently to the right and release. You should hear the machine power up. Ensure that the door/lid of the machine is closed. The machine now starts an automatic calibration, moving the bed to its lowest position, and using the end stops to automatically home the laser head. Use the buttons on the control panel to bring to bed up - stopping a few cm below the laser head.
Load your material, aligning to the rulers and pushing it gently to the top left. This is the origin point.
Ask yourself,
- Is this the correct sheet thickness?
- Is there a correct side to cut from, is that facing up?
- Is it flat or bowed/cupped upward/downward?
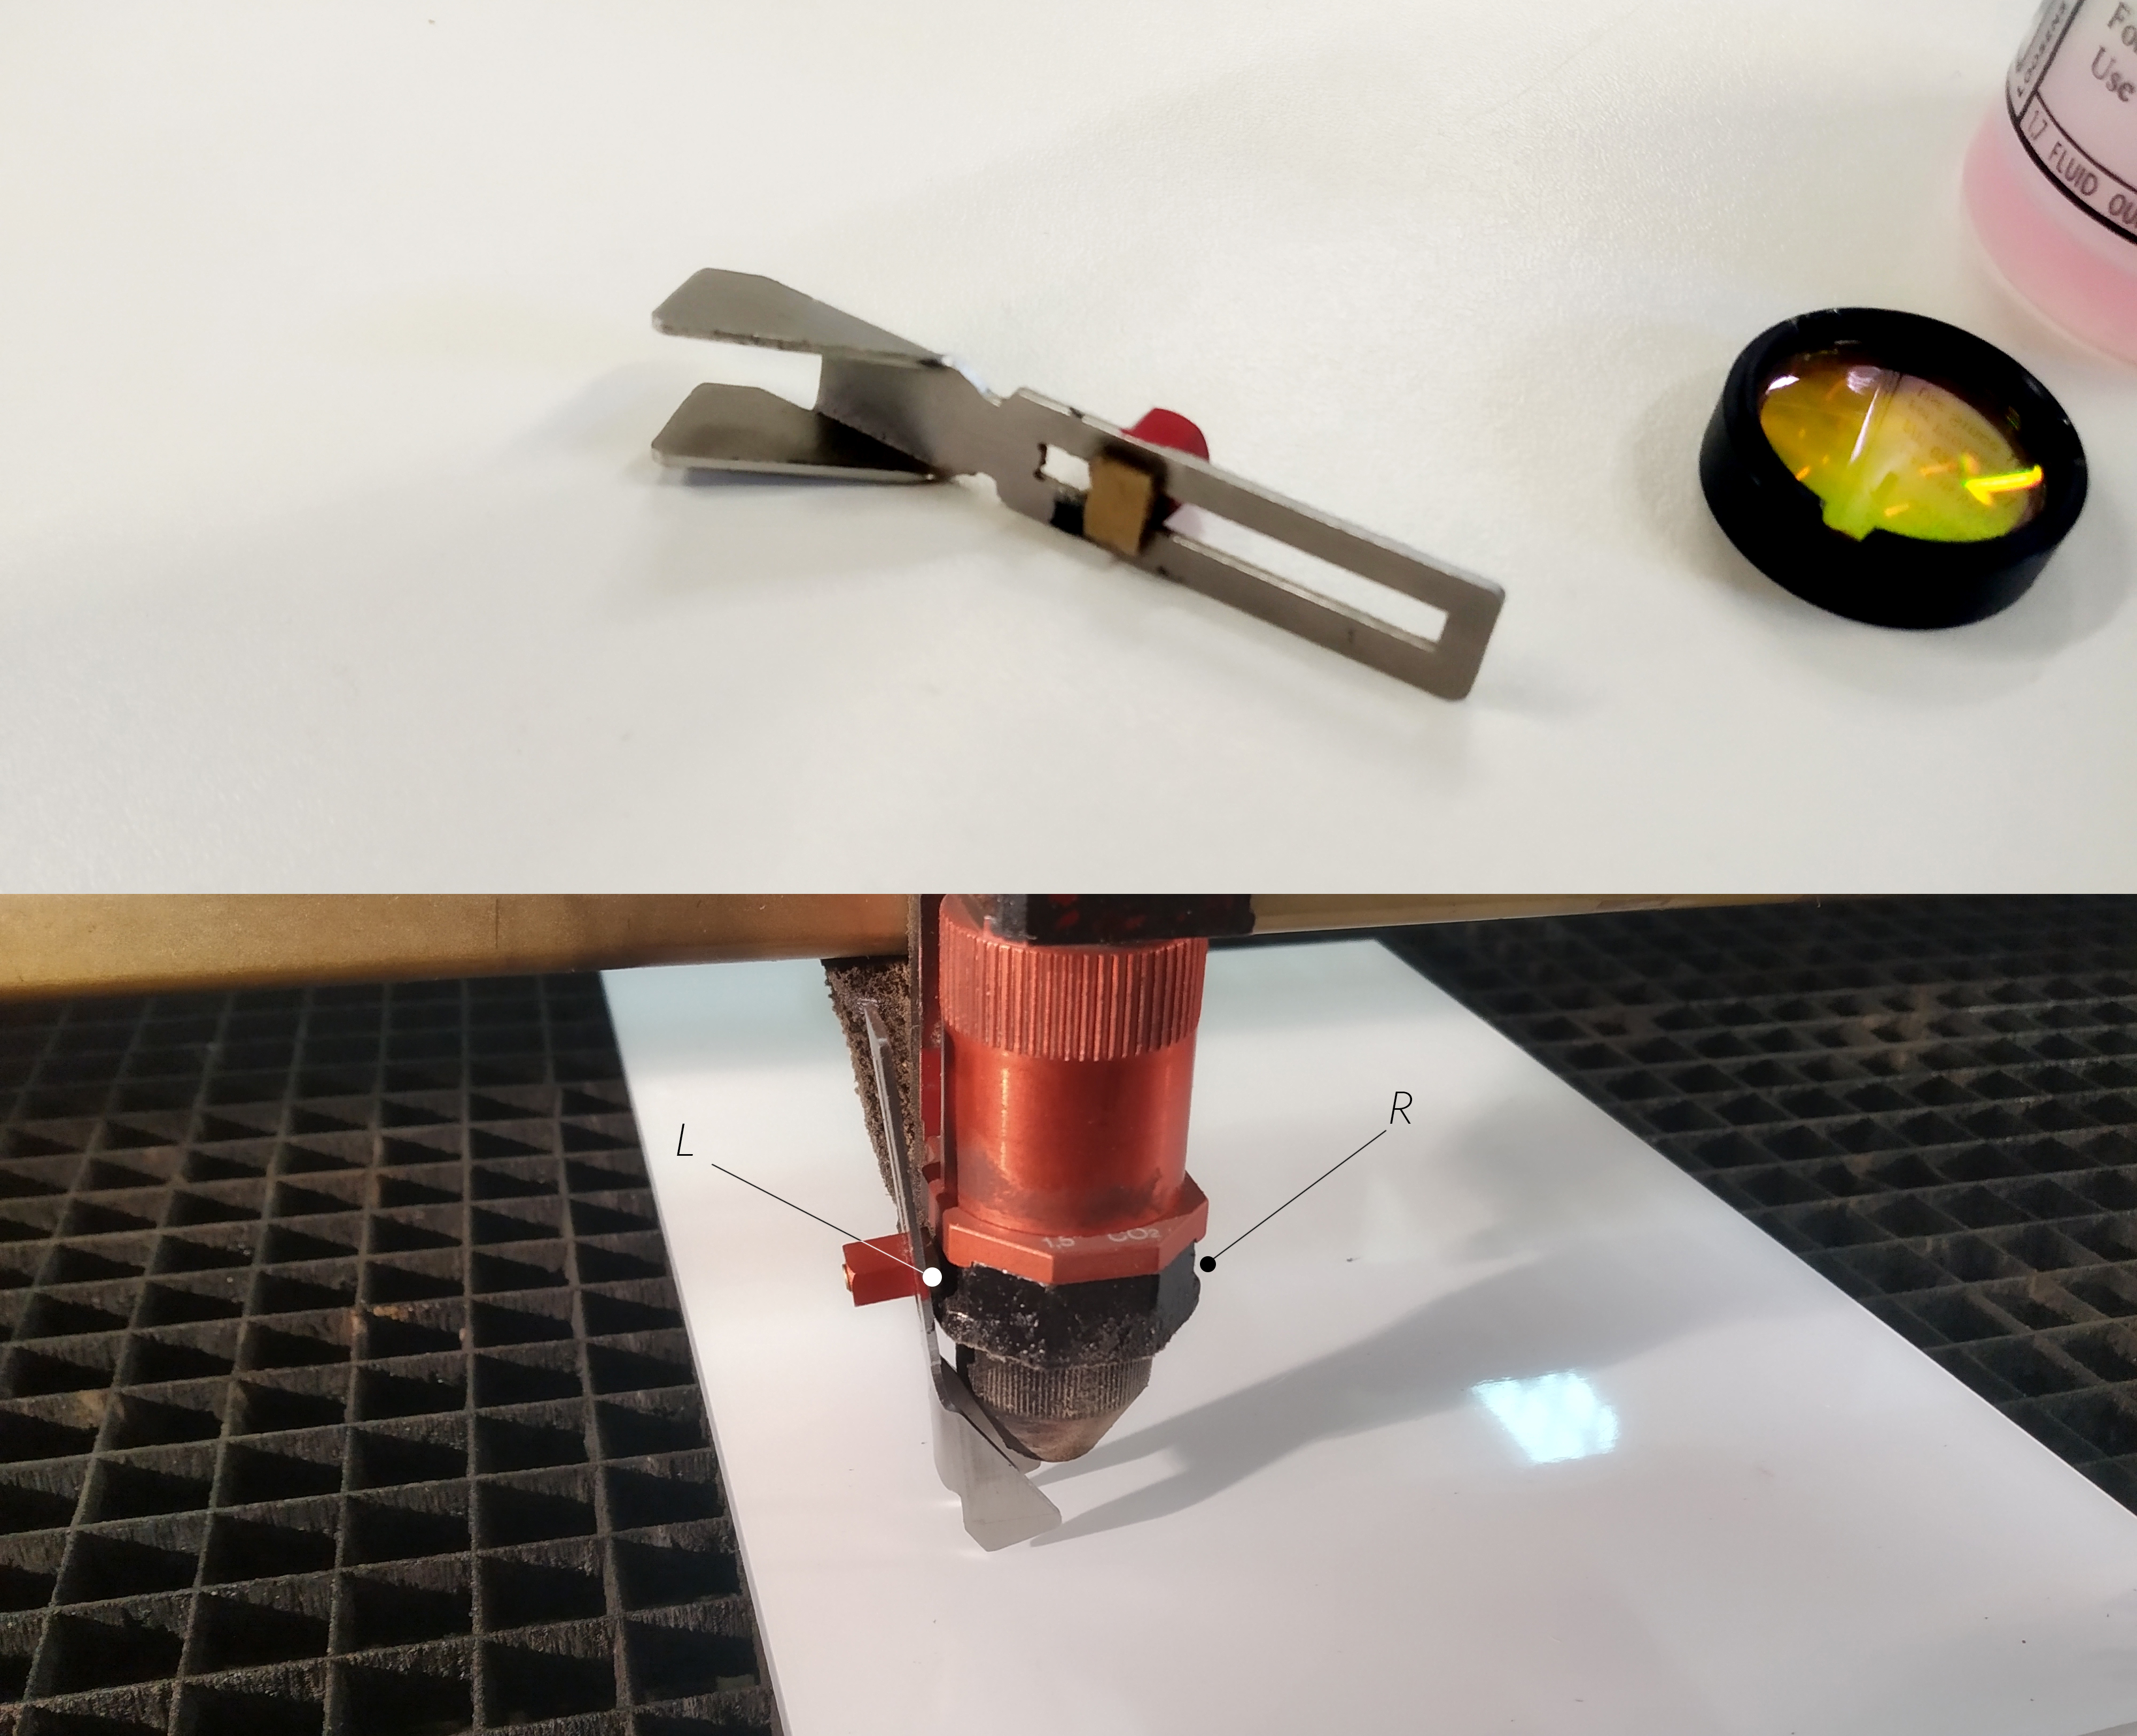
Now take the focusing tool, which is kept by the control panel. This gauges the correct distance between the laser head and the top surface of the machine. As shown, place the brass part in the slot at the side of the laser head (L and R indicated above). Bring the bed up slowly now, until the material knocks off the focusing tool. Return the focusing tool. Continue to set up your job in Illustrator and Job Control. You do not need to return the laser head to the origin position, as this will be handled automatically at the start of the job.
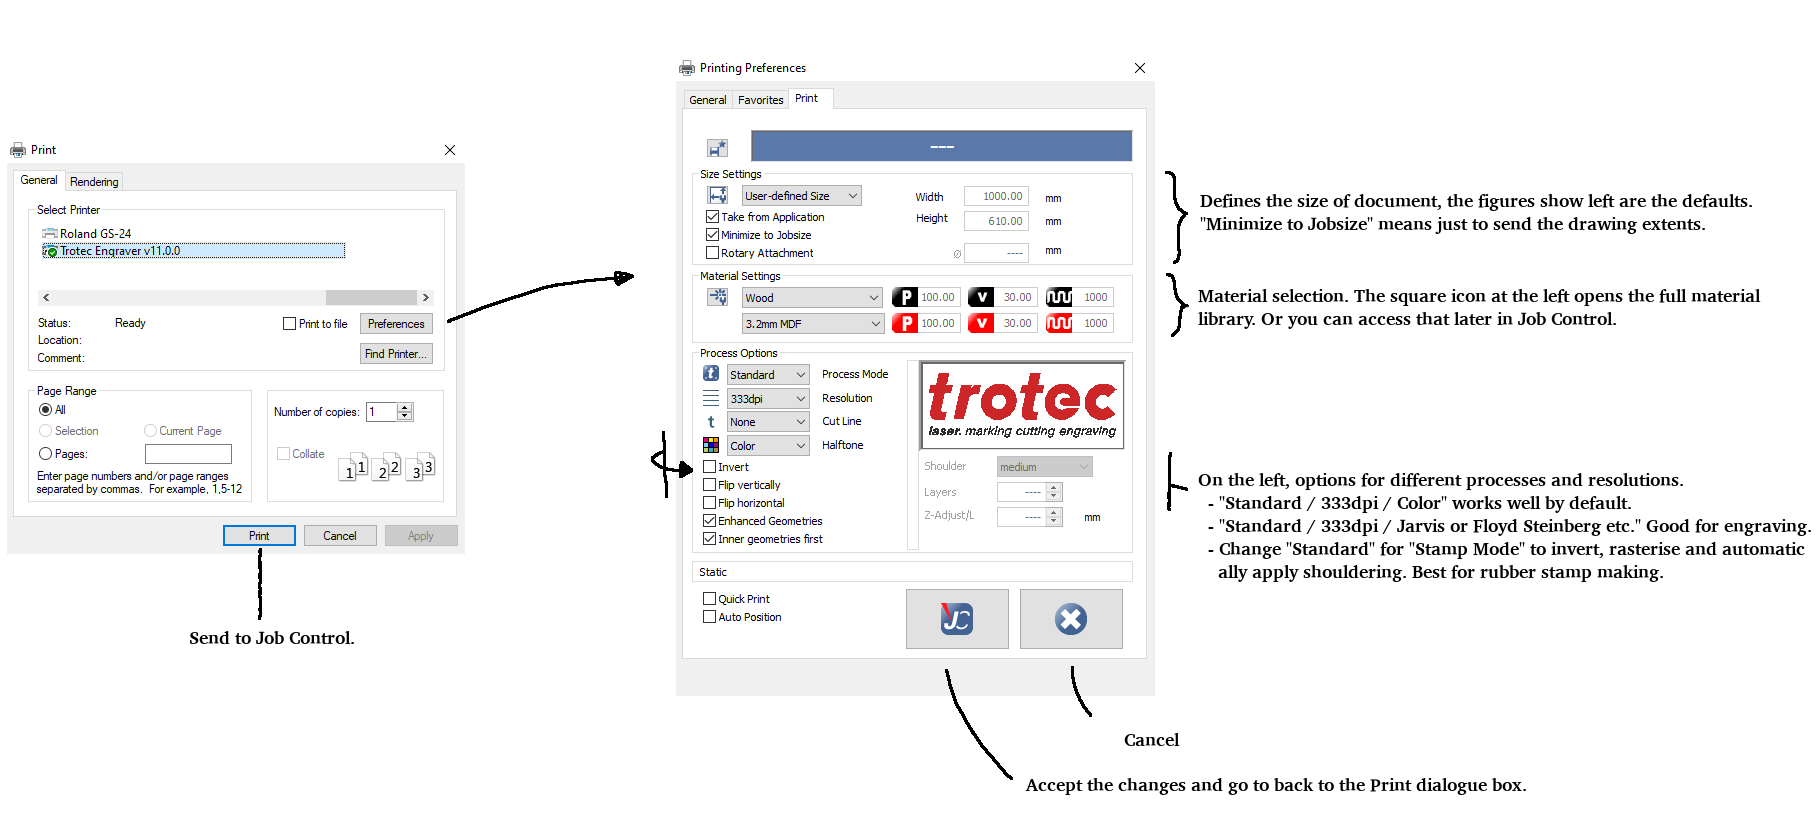
2a. Sending from Adobe Illustrator
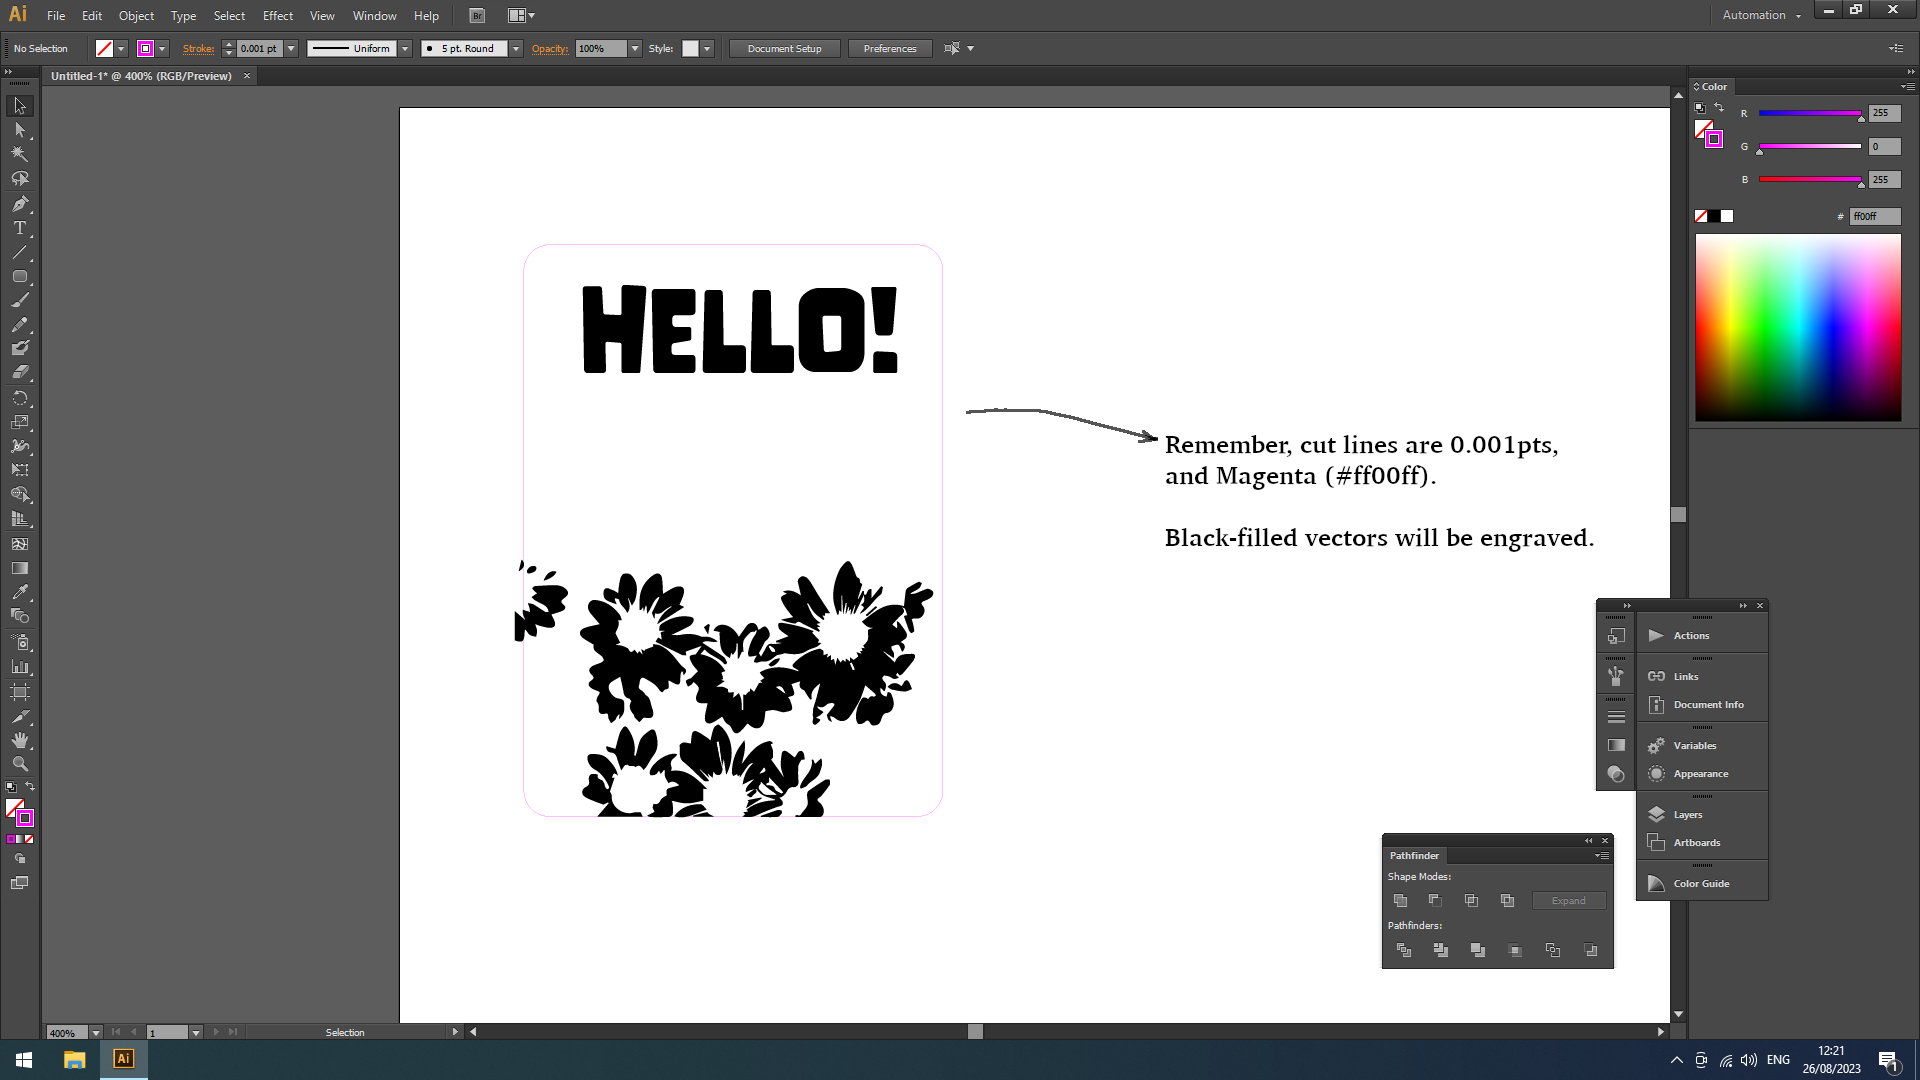
- If your drawing is ready, click
File > Print. - Now click
Setup > Preferencesto open a dialogue box, where you have options about document size, material selection and resolution and raster processing.
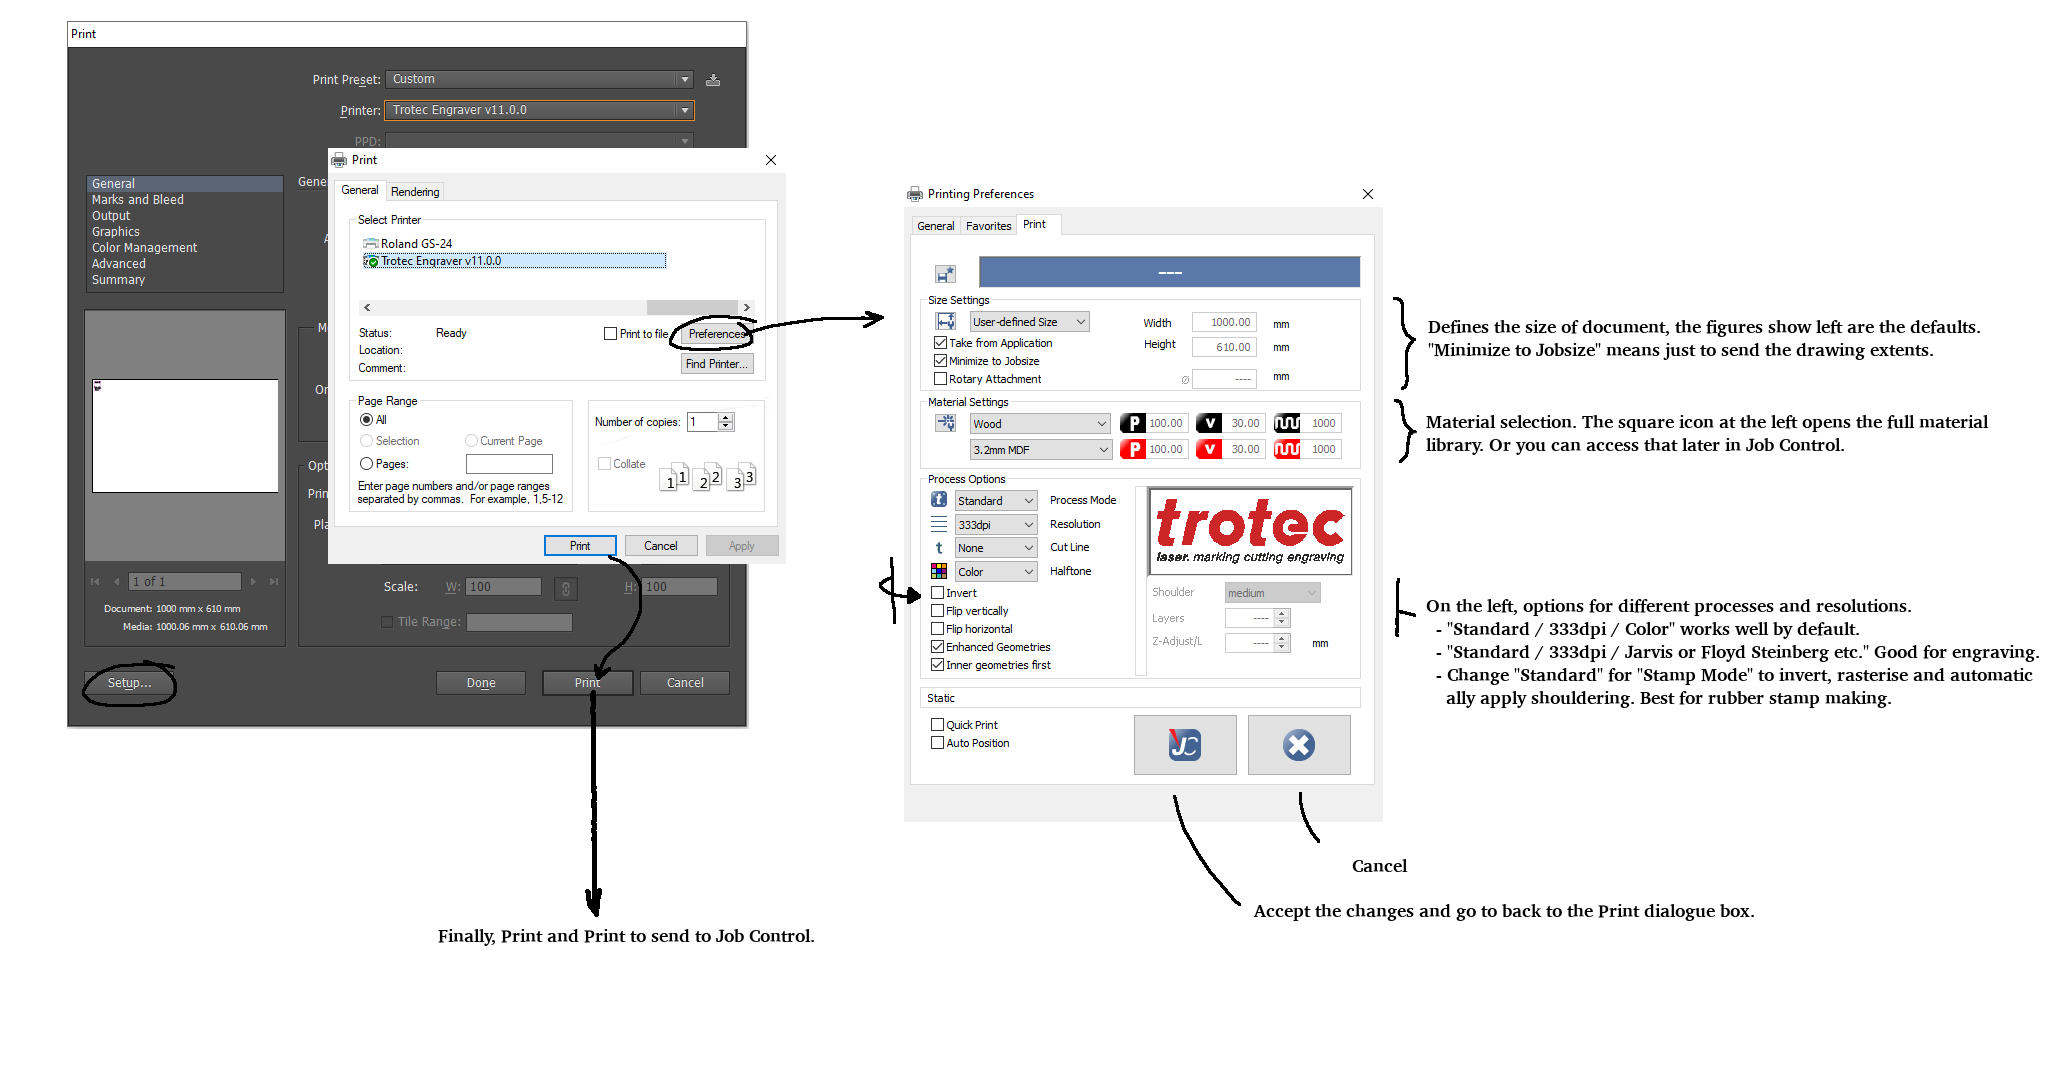
- The large
JCbutton at the bottom of the window will save your settings, and thenPrint, andPrint. - Proceed to 3. Sending via JobControl.
2b. Sending from Inkscape
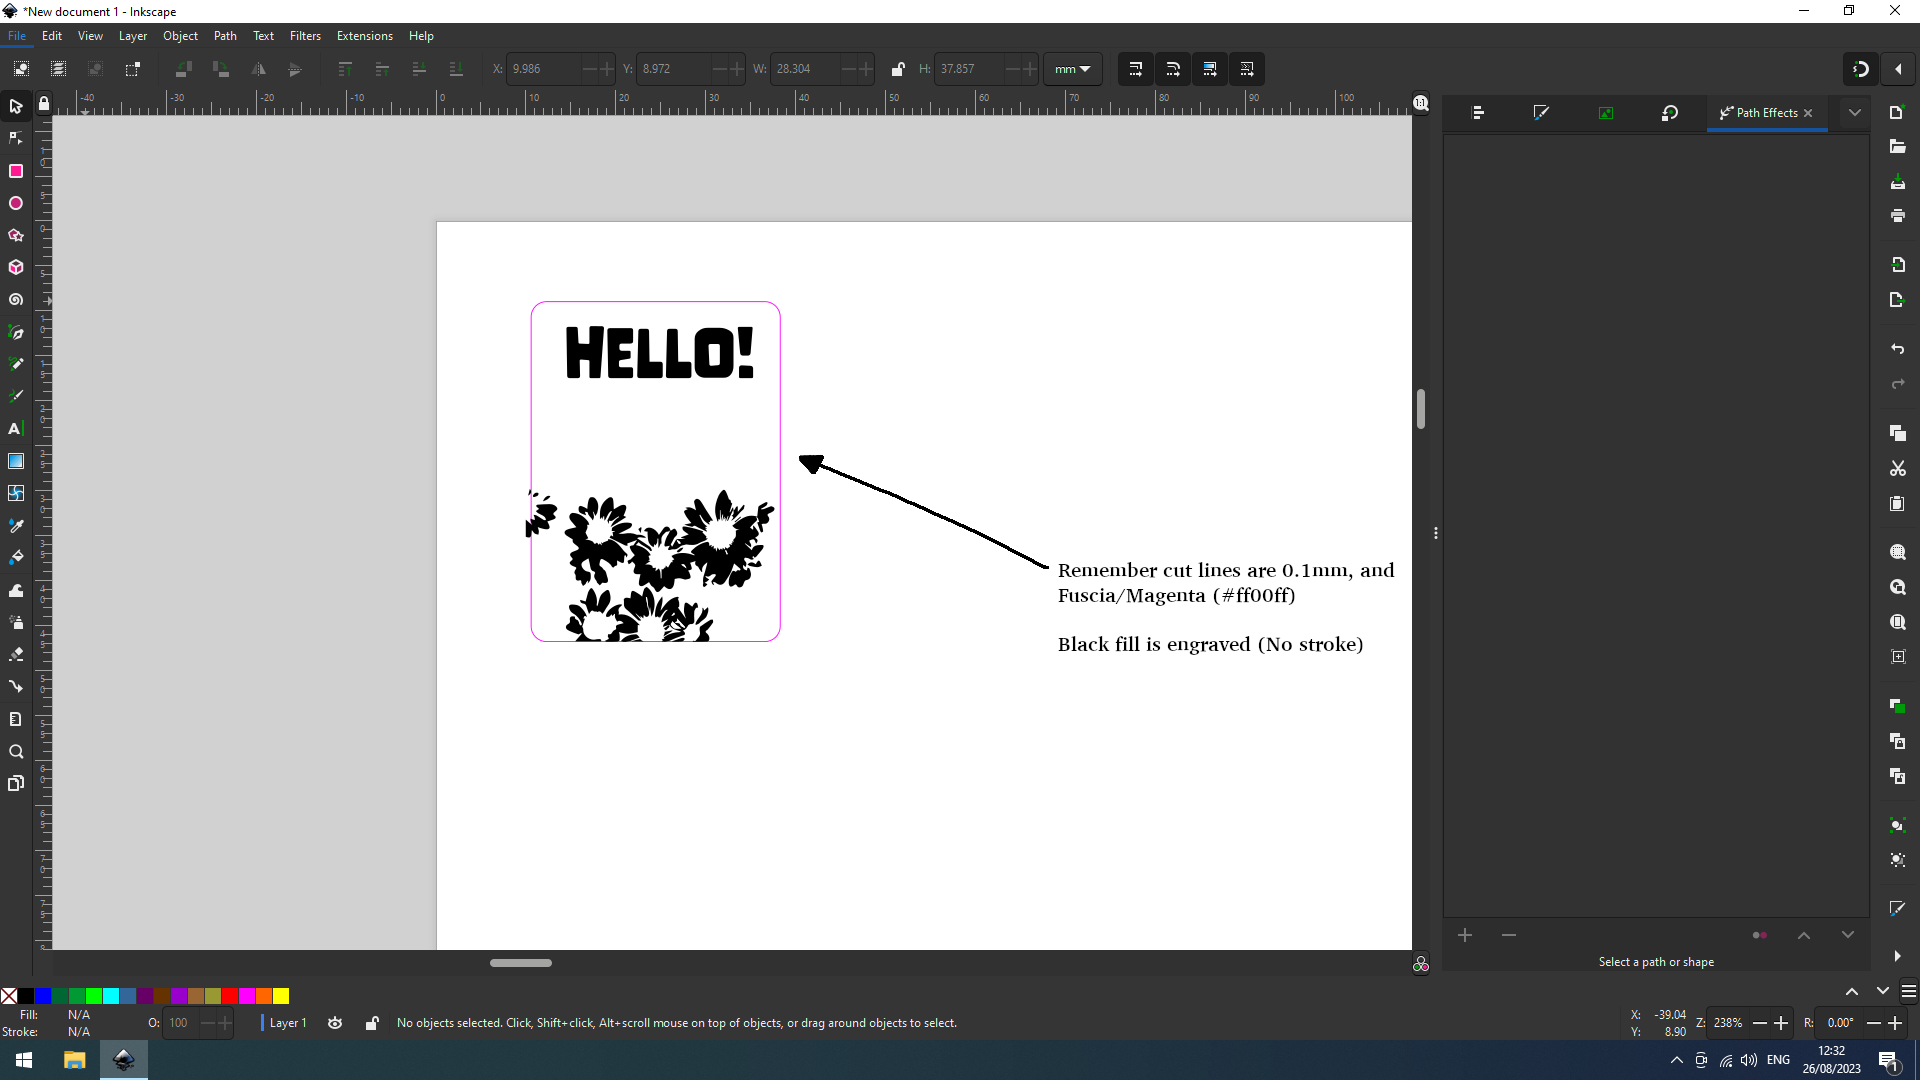
- If your drawing is ready, click
File > Print. - Now click
Preferencesto open a dialogue box, where you have options about document size, material selection and resolution and raster processing.
- Apply your settings and Print your drawing - The large
JCbutton at the bottom of the window, and thenPrint. - Proceed to 3. Sending via JobControl.
3. Sending via Job Control
- A new job should open JobControl automatically. If not, open the JobControl software from the Start Menu.
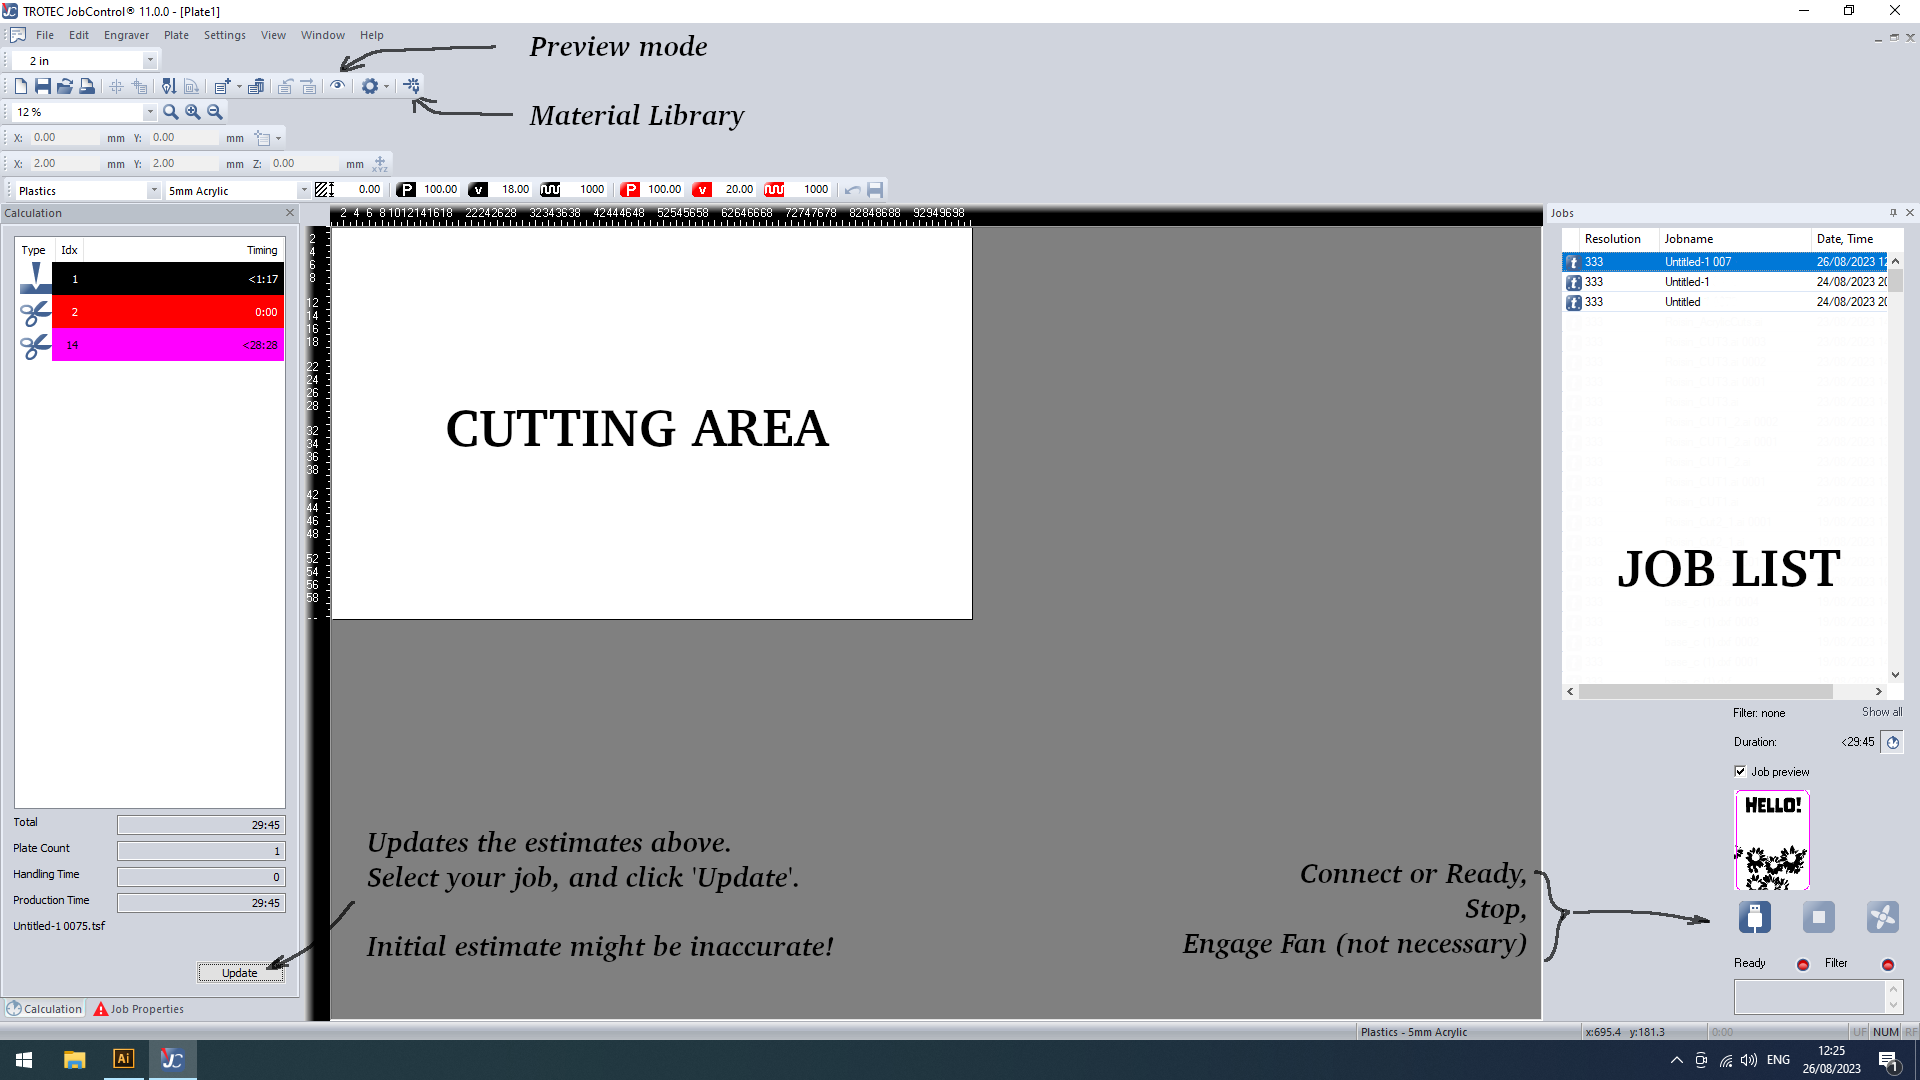
- On the right hand side, there is a jobs queue. Drag your job from the list onto the cutting area in the centre of the screen. You can order the job queue by date/time to make this easier to find.
- If not already connected, press the connect button on the right hand side - it looks like this:
 .
. - If ready, click the
'ready'button ( ), and start the laser!