Inkscape
![]()
Sections
- Set up your workspace
- Bounding Box and General Preferences
- Page size and Document Preferences
- Raster vs. Vector
- Drawing Tools
- The Two Selection Tools
- Other Drawing Tools
- Group and Ungroup
- Combine, Break Apart
- Stroke and Fill
- Boolean Tools
- Layers
- Output
- Other
Downloading Inkscape
Inkscape is an open-source 2D drawing program. Inkscape will run on Linux, other Unix-like operating systems, Microsoft Windows, and OSX.
To get Inkscape, go to inkscape.org The current version is 1.1.2.
Setting up your workspace
From the menu bar at the top, select View > Default so that all your toolbars and panels are laid out as used in this guide.
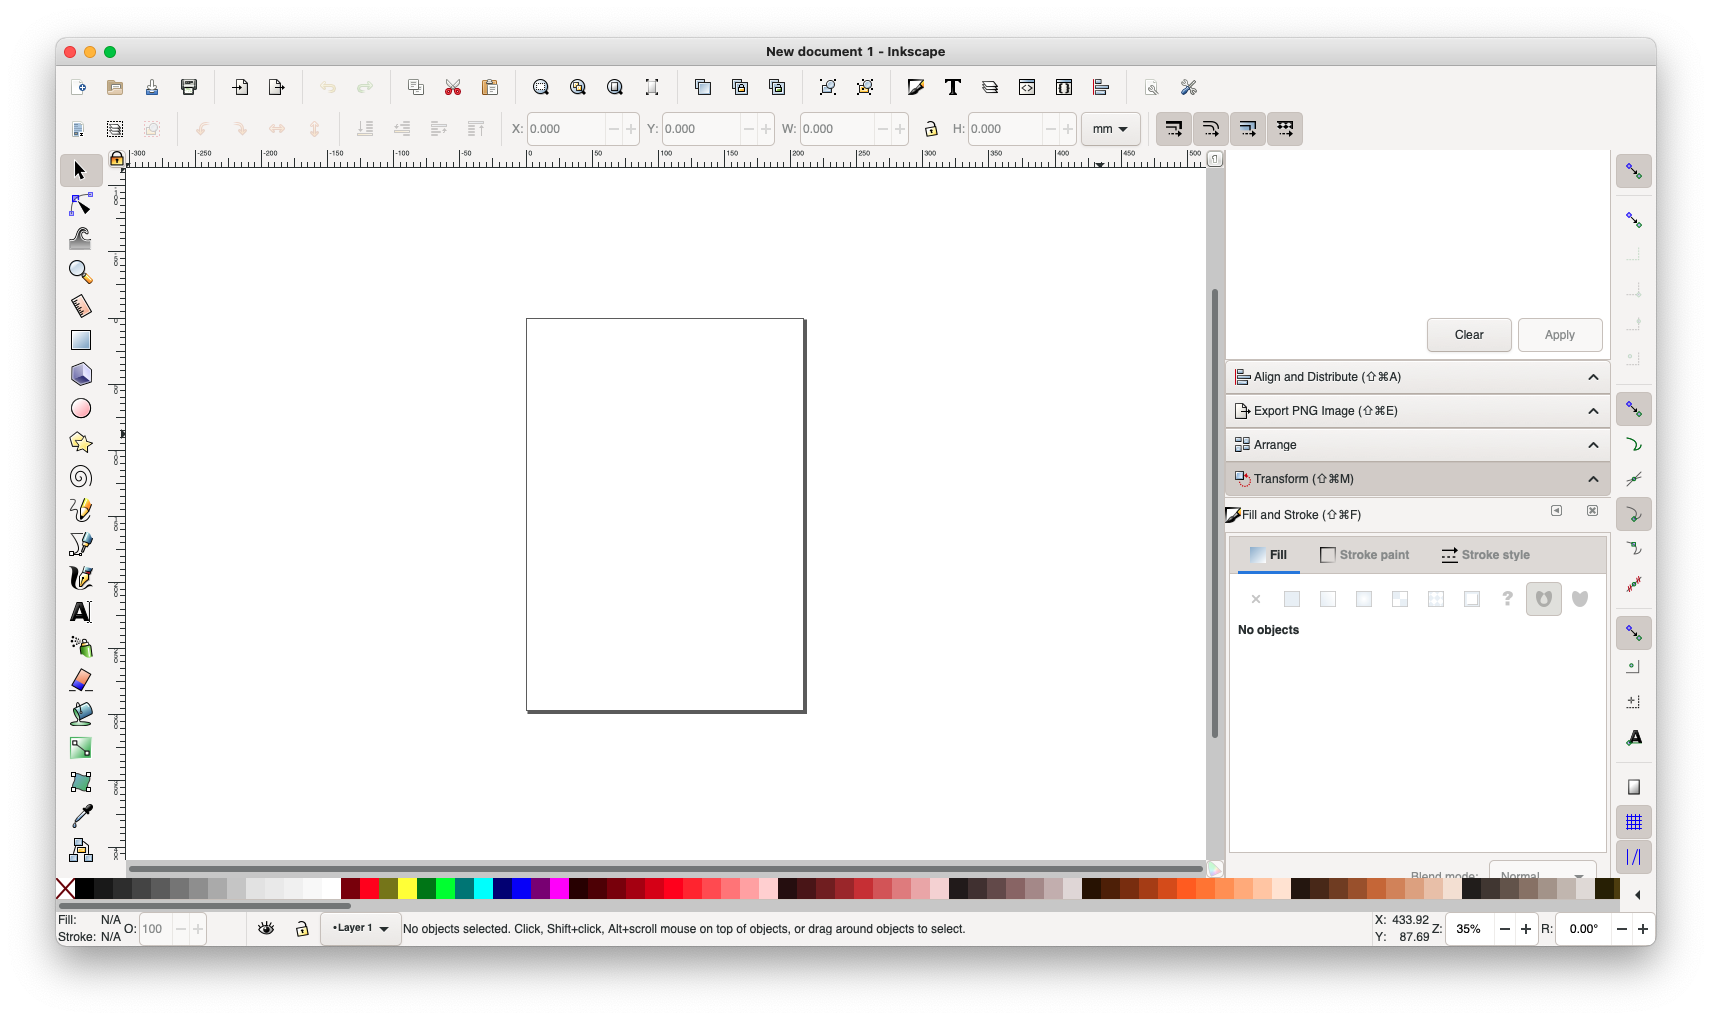
Inkscape has many dockable panels that make more tools accessible and make it easy to change tool and drawing settings while you work.
A useful set of panels to get started:
- Layers (at the top of the Layers menu)
- Fill and Stroke (Object menu)
- Align and Distribute (at the end of the Object menu)
- Transform (Object menu)
- Arrange (Object menu)
- Text and Font (Text menu)
The second row of the toolbar along the top of your window. Icons change depending on the current tool and allow you to set Width, Height, Number of sides and other properties.
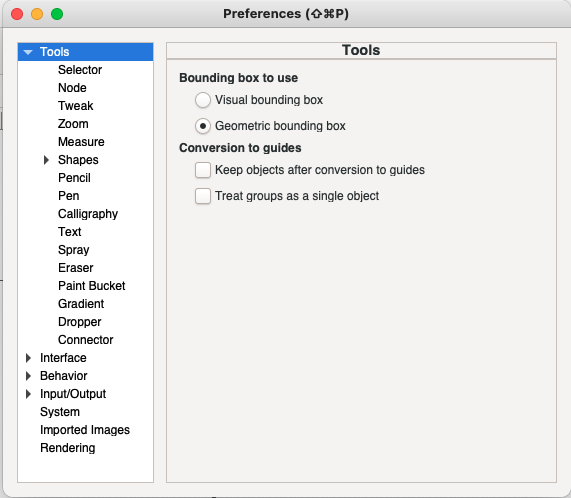
Bounding Box and General Preferences

Click the above icon or go to Edit > Preferences....
Select Geometric Bounding Box instead of Visual Bounding Box.
This is important for setting precise object dimensions later. It means scale tools, transform tools etc. will use the centre of the line in operations.
Page size and Document Preferences

Click the above icon or go to File > Document Preferences and set the page size to 1000.0 x 610.0 and the units to "mm".

Raster vs. Vector
Computers store images in grids of pixels, for example .PNG, .JPEG and .BMP formats This is an example of Raster data, sometimes also called a Bitmap - literally a map of bits describing colour values.
Vector graphics are composed of point coordinates, tangents, line thicknesses, colours and other style information with high precision. These graphics can be stored, for example, as .SVG files, which is an .XML-based format.
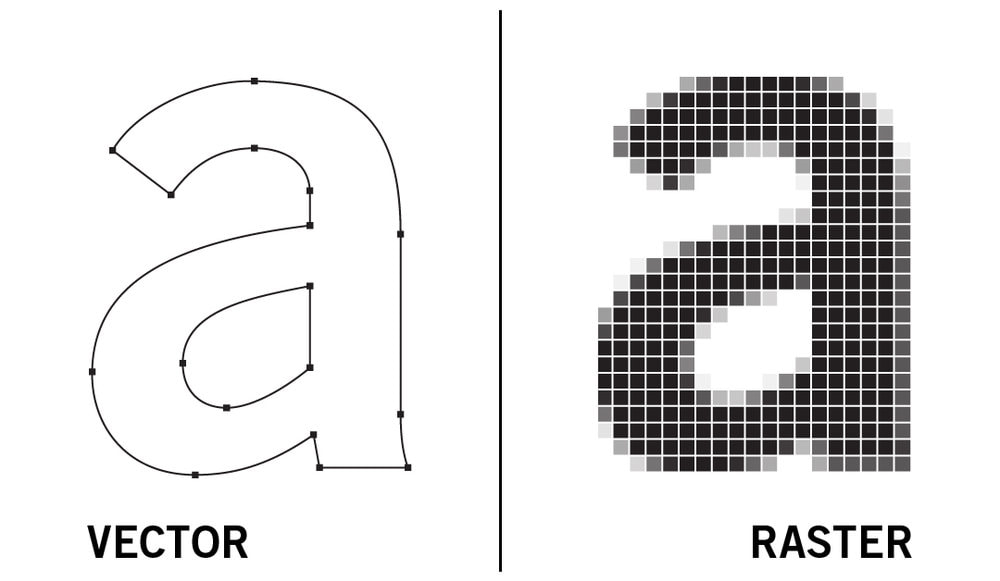
image by seekacreative.co.nz
Vectors are scalable i.e., they can be scaled up and retain the definition of the original graphics. In many cases, this saves on file size and gives a crisp image on your screen.
Vector lines can be easily used to control our machines, and Raster graphics can be used very effectively for engraving, opening many new possibilities.
In order to take advantage of both when lasercutting, we use programs like Inkscape or Adobe Illustrator. Other programs are possible to print from, like AutoCAD and Rhino, or indirectly, programs like Solidworks etc. from which you can export .DXF files.
Drawing Tools
Note for Apple users: The "Command" key is not used in Inkscape by default. Shortcut keys that typically usually use “Command” key in Apple use the Ctrl key. “Ctrl + S” to save, “Ctrl + O” to open, and so on.
Rectangle (Shortcut: R) and Ellipse (Shortcut: E) Draw a rectangle or an ellipse by clicking and dragging.
Hold Ctrl to constrain aspect ratio(i.e., keep width and height the same, to draw a propotional square or circle). Ctrl will also snag to 15 degree propotions as you draw. Holding Shift lets you draw from the centre of the shape.
Practice drawing with these modifiers, and try the Pentagon and Spiral tools. Use these with the Boolean Tools described below.
The Two Selection tools
The Selection Tool (Shortcut: Space) is for selecting whole objects and the Node Selection Tool (Shortcut: N) selects vertexes, paths and parts of objects.
With the Selection Tool, click once on an object to see a set of 8 draggable tabs around the object. Use these to resize the object, with Ctrl, resize proportionally, and with Shift, resize about the centre of the object.
Click the object again for rotation and skew tabs. Double-click to enter Node-Editing on the selected object.

As you do, you will see a number of new icons on the Toolbar at the top. These icons are, in order, to add and subtract, to join and split, join-with-new-line-segment, delete-line-segment, four icons to edit the curvature at the corner, straighten line segment and curve line segment , object-to-path and stroke-to-path.
Other tools for making paths
The Pen Tool(Shortcut:B) - used to make and edit handled curves.
The Pencil Tool(Shortcut:P) - draw freehand vectors. Double-click the icon to change the smoothing factor.
The Calligraphy Tool(Shortcut:C) draws styled curves. Paths drawn with the calligraphy tool are not maintained as centre-lines. The resultant shape is an outline.
Group (Ctrl + G) and Ungroup (Ctrl + U)
Hold Ctrl when selecting objects to add to the selection. Make a group to keep the objects together in other operations, like moving and copying.
Combine and Break Apart
Path > Combine or Break Apart to create or unmake compound parts which form a single object. More than a group, combined shapes have to keep the same style and affect internalness of each path if overlapping.
Stroke and Fill Settings
The following can be set from the Stroke and Fill panel (from the Object menu at the top) or from the icon and swatch at the bottom of the screen.
- Stroke thickness,
- Align to centre, inside, outside,
- Corners (Rounded, Mitred or Chamfered),
- Stroke Colour, Pattern or Gradient,
- Fill Colour, Pattern or Gradient,
- Opacity and Blending Modes.
Right-click on the colours in the swatch bar below, and click "Set Fill" and "Set Stroke".

You can remove and change aspects of the fill and stroke colours at the left. Right click on the number next, "0.265" in this example, and you can set the stroke thickness. The 100 beside "O:" is the percentage Opacity.

Example:
- Select an object, a basic shape.
- Right-click on the colour swatches, on Fuschia, and select "Set Stroke".
- Right-click on the object properties bar, on "Fill:" and then "Remove Fill".
- Set the line-tickness to "0.1" and "mm".
- Ensure that "O:" is still set to "100".
These four steps, will assign all the properties you need for a Cut on the Trotec.
Boolean operations
Use Path > Union/Difference/etc. to perform boolean operations, like to add two shapes together, or to get one shape to cut a hole out of another. When using subtractive boolean commands the top shape is taken away from the bottom shape.
Layers
Layers are a convenient way of organising your drawing. Layers in Inkscape organise the priority of objects (i.e., which items go on top of the other), layers can be hidden and locked.
As of version 1.0, the panel in Object > Objects is a very useful alternative, similar to other programs like Illustrator. It allows inspection of all objects in a list, can organise groups in an expandable list.
Output
Through the Save As dialogue, you can save as .SVG, .EPS, .PDF and .DXF.
Inkscape works natively with .SVG files, which can be used for laser cutting. Remember to outline any text elements and to assign the correct colours to cut and engrave lines.
File > Export PNG Image... has a dialogue box of its own allows you to set many different options and export in Raster format.
Other Tips (optional),
To set the default document size, download our Trotec file (for Inkscape) and pop it in the directory C:\Program Files\Inkscape\share\inkscape\templates (Windows) or ~/.config/inkscape/templates (Mac).
* You can make other changes to the default document this way. You just need to save a file called default.svg and put it in this folder. You need to save it to another location first, as you more than likely don't have permission to change these folders from within Inkscape.
** ~/.config is a hidden folder, so you may need to change your Finder's view setting to see it on Mac. However if you click Go > Go To Folder you can copy the above location to be taken to that location.
To set the colour swatch to the Trotec colours, download our Trotec Swatch (for Inkscape) and pop it in C:\Program Files\Inkscape\share\inkscape\palettes (Windows).
For more tutorials have a look at: