Preparing Drawings for Laser Cutting
(Ruby)
v0.1 by Ger Walsh - Nov 2023
Steps
- Vector and Raster drawings
- Setting up Drawings
- Things to Consider...
- Filetypes
- Other Techniques:
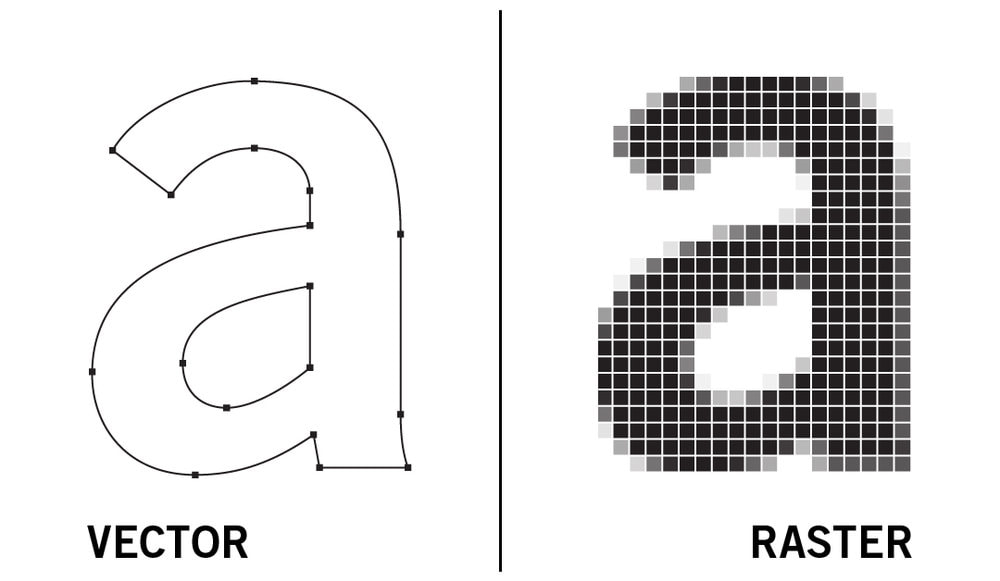
Vectors vs. raster drawings
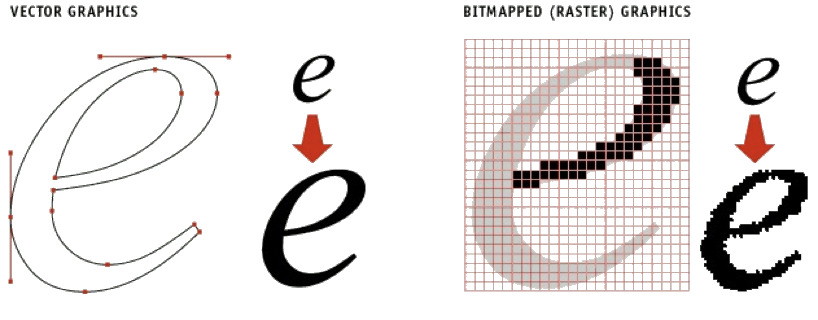
Laser cutters can process graphics in vector format as well as images for engraving - each are processed in different ways to send to the machine. A raster image (an image in .JPG or .PNG format) is processed in rows and columns, according to the intensity of each pixel in the image. Programmes like Adobe Illustrator and Inkscape can prepare files containing both raster and vector graphics.
Setting up Drawings
The Page/Artboard size should be enough tp fit your graphic. Your Display Units should be set to
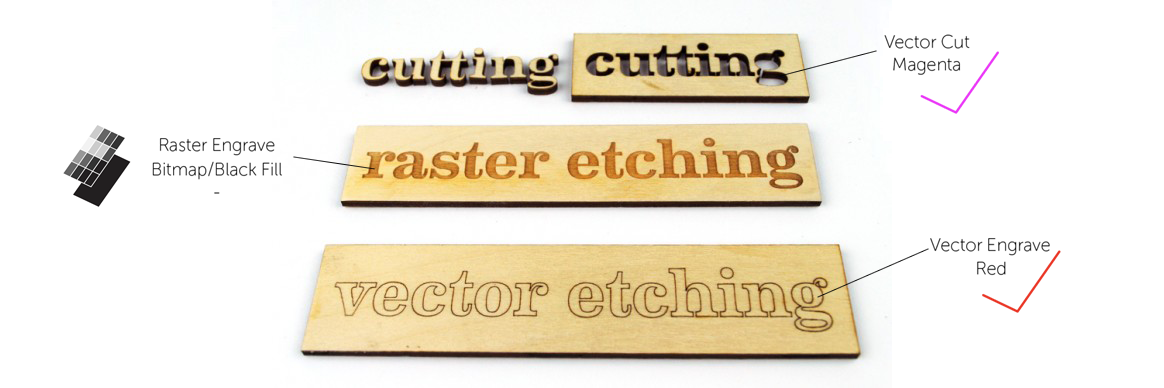
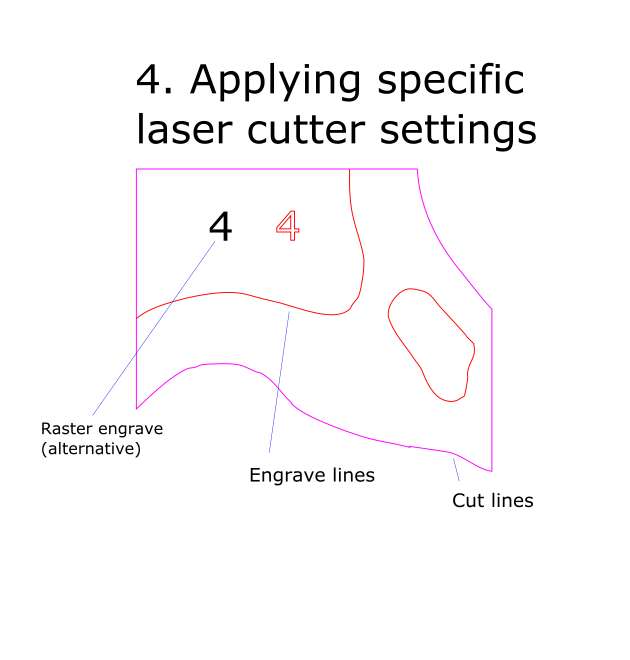
mm. The max size for the Trotec is 1000mm x 610mm (landscape), though your material may be smaller.Cut lines are
(Called Fuscia in Inkscape)
- Etch lines are
- Engraving: either a black filled shape
- or an image. Ruby has in-built features to invert or adjust contrast in images.
Things to Consider...
- Don't use a material edge as one of your cut edges. Unless that's what you mean to do. It won't be accurate, match other cuts or have the same edge finish.
- Sometimes material won't be pre-cut to the exact size (sometimes that is on us), so allow a margin at the edge, maybe as much as 5mm. Or be prepared to move things slightly and always check with the crosshairs.
- The Kerf or Burn is the clearance or width that the laser cuts. It varies per material and if it's important to your job, you should test it before sending your main cuts.
- You should outline your Text Objects. This converts them to a vector outline and you can treat them as one of the linetypes above. Our computer will replace any missing fonts with Arial or Times.
- Unassigned colours can be used as guides that help you align or position something but not cut.
- The material profile sets the Power(% of 80W) and Speed(% of 3.55m/s). The speed is inversely proportional to the depth of your cut. For example, the slower you go, the more you cut through. We don't restrict the changing of these on our machine, but if you are changing a profile, perhaps copy it first and/or let us know. Tag the new material with "test" and maybe your own name.
Filetypes
Adobe Illustrator (CS6) and Inkscape are installed in the lab.
.AI.DXF.SVG.PDF.EPS.JPG.PNG- ...
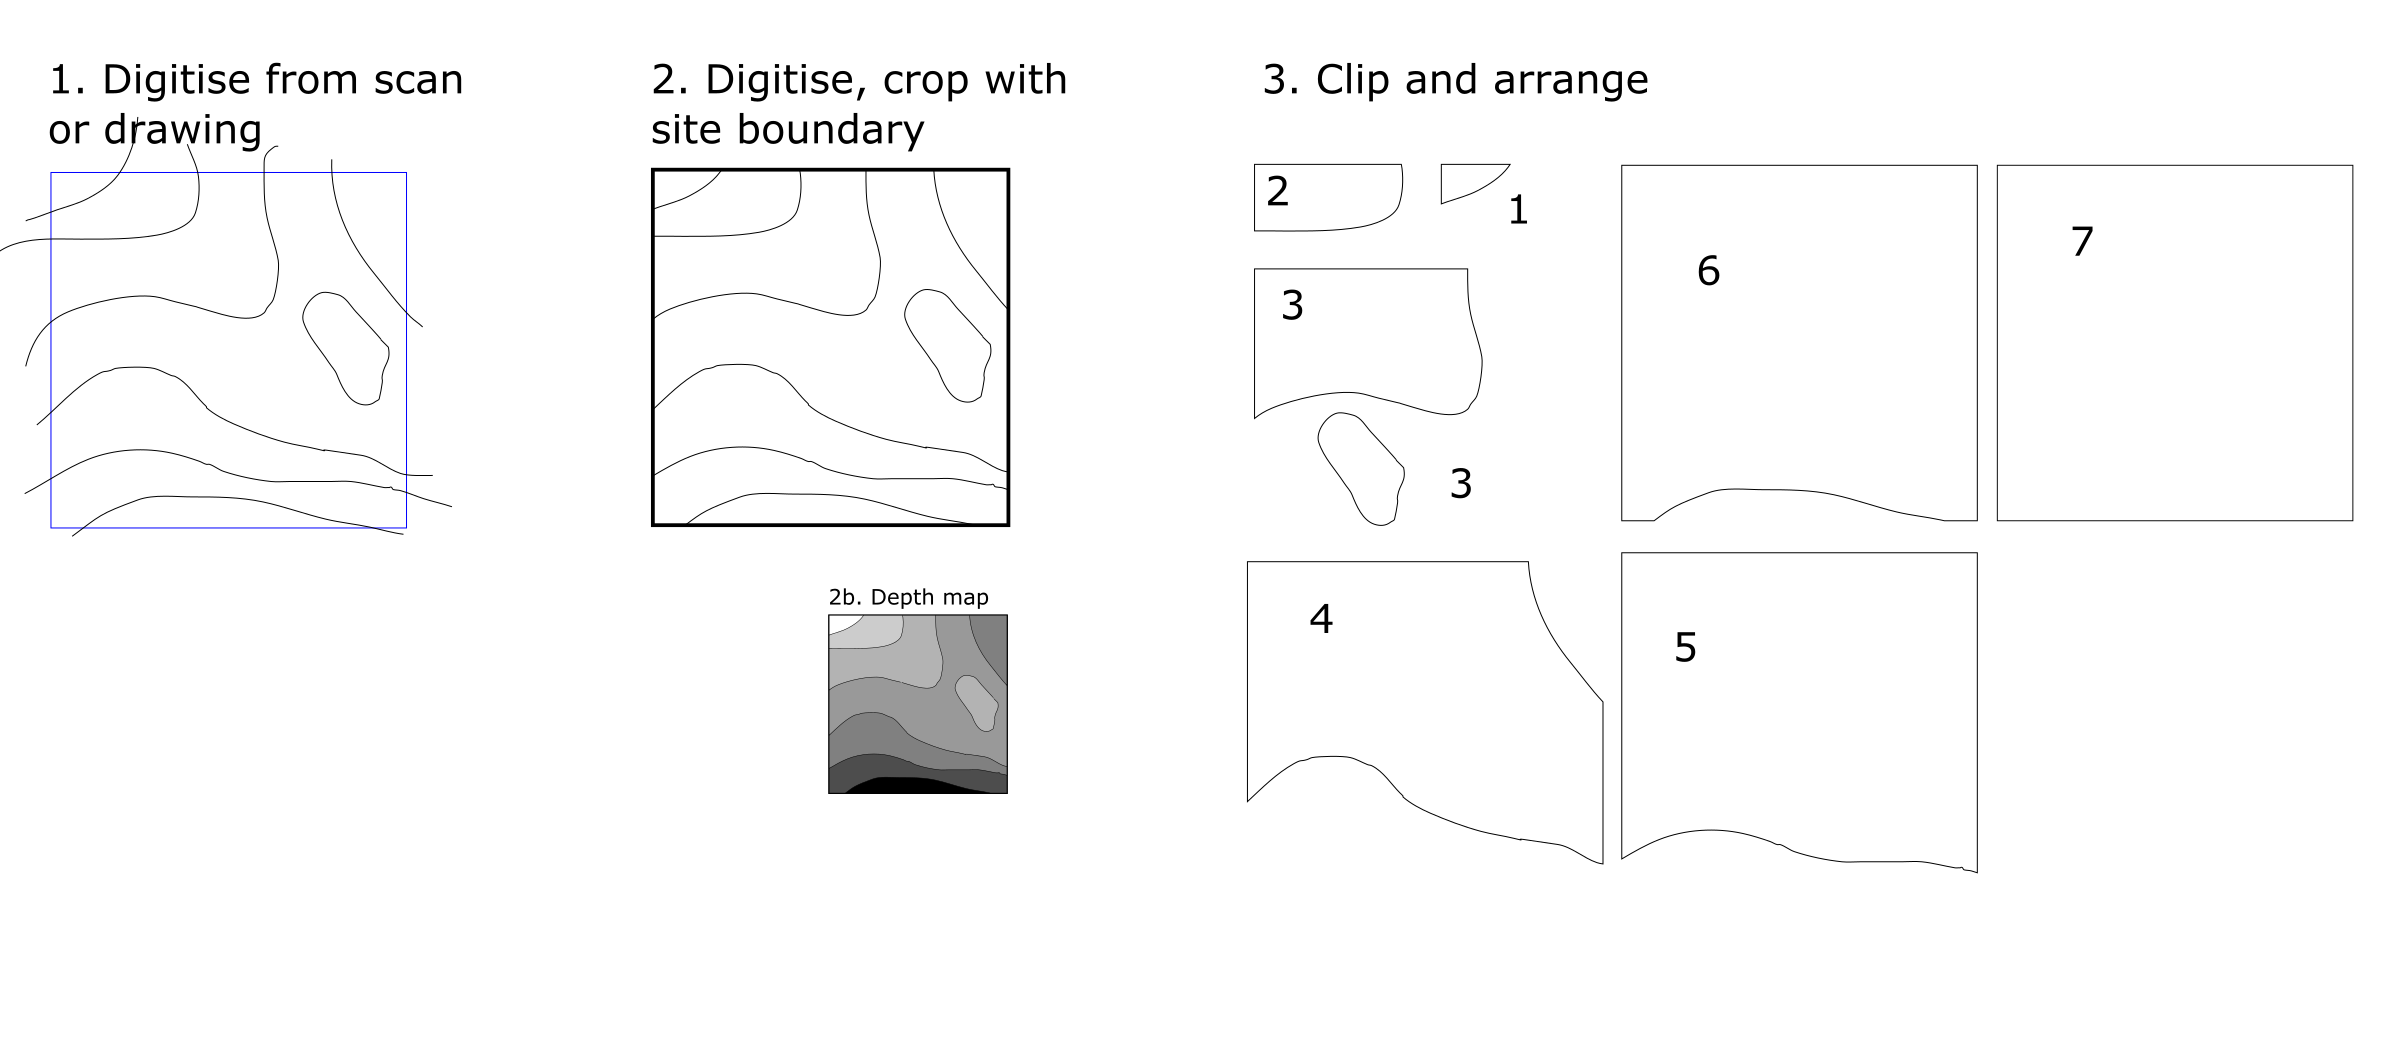
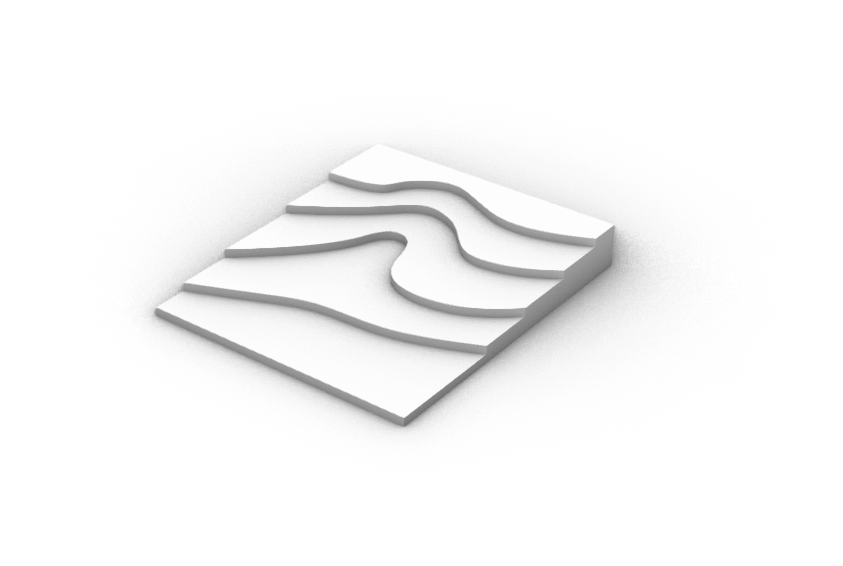
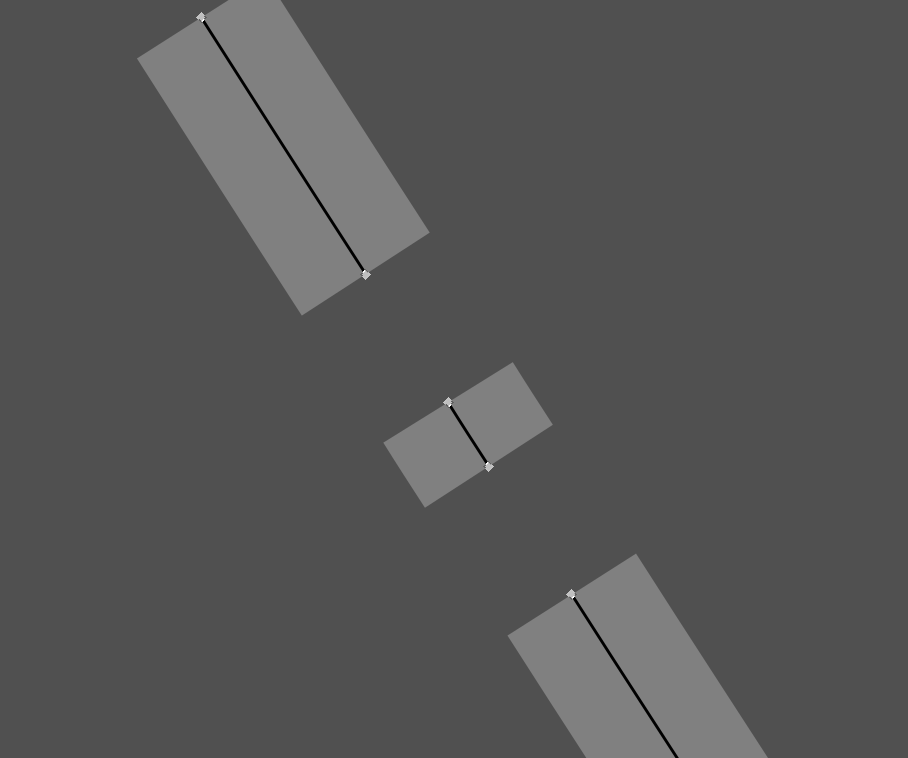
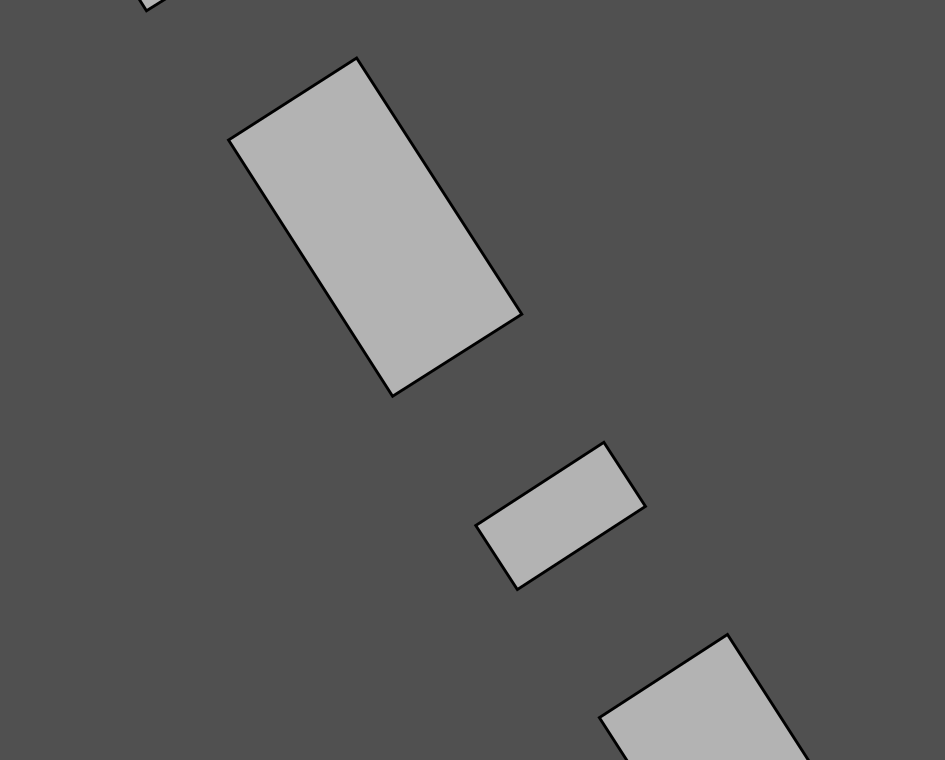
Further Techniques 1: Cutting Contours
If you are looking to make a stacked contour model, be sure to join the boundary and each contour so they cut separately, as below. in step 3.
You can etch lines to mark and position the next layer up. You can overlay markings to be engraved on that contour - trim or crop to the exposed part to save time!
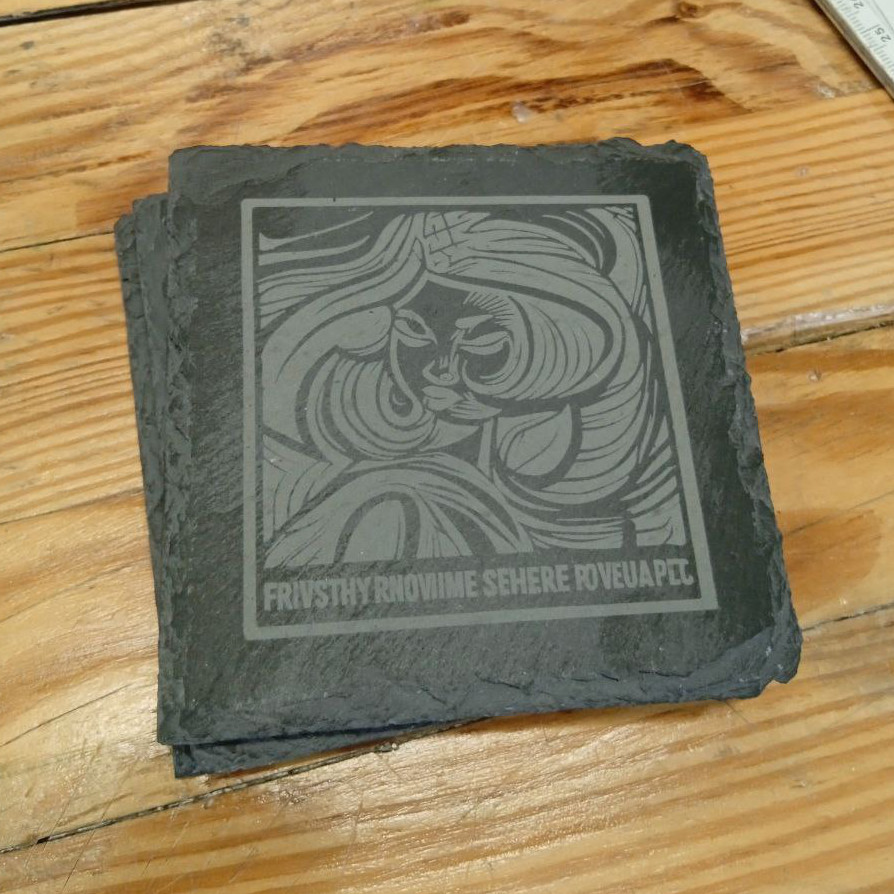
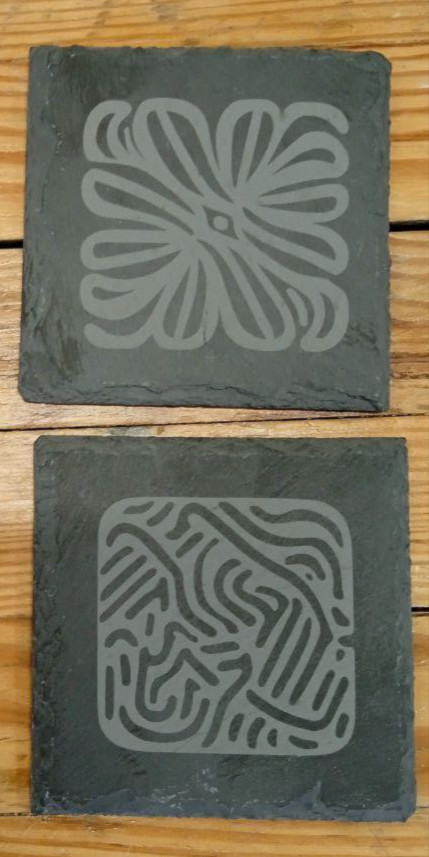
Further Techniques 2: Etching Glass and Stone
When etching glass, it is important to watch out for both dust given off by the material, and to dissipate the heat imparted on the glass.
A successful technique we've used to address both concerns, has been to cover the glass in newspaper and to wet the newspaper with a water spray. Pause, check and clean the lens every two-three minutes.
We have etched Float Glass (4mm), Borosilicate Glass (2mm) and Studio Glass (TBC).
When etching stone, be vigilant and watch for dust clouding the lens. Clean the lens every two-three minutes. Dust on the lens causes heat to build up in the laser lens itself and could crack it!
We've etched Slate and Granite (Polished). Natural slate is very reliable and easily available. Synthetic slate is generally made of fiber cement and shouldn't be lasered!
In both cases, prepare. Do not risk breaking something irreplacable, and maybe bring some spare material to test on. Conside inverting your image. What you etch will be white on clear/stone/etc. Use of Photoshop or GIMP to adjust your levels and to increase your contrast may also improve your result.
Further Techniques 3: Tracing
Called "Image Tracing" (in Adobe Illustrator) or "Bitmap Tracing" (in Inkscape), tracing is the process of going from a raster/bitmap/jpg/image to a vector.
First, get your image into either program. You can use Open With..., or if you image is on the web, you can right click, copy, and then paste it in.
In Inkscape, bring up the panel, by going to Path > Trace Bitmap. The default settings you see on the panel, are for:
- Single Scan
- Brightness Cutoff
- Threshold (which is a number from 0.000 to 1.000, default is 0.450)
- Options for removing Speckles, Smoothing Corners and so on.
*Click here for Adobe Illustrator steps
In Illustrator, the button appears in the top tool bar, when you have an image selected, "Image Trace". Or on the Properties panel at the right.
If it's not there, go to Object > Image Trace > Make. After you click it, there is a symbol that will bring up a panel with all the other options.
Further Techniques 4: Real Dashed Lines (Inkscape only)
An extension pre-installed in Inkscape,
Extensions > Modify Path > Convert to Dashes
Set the desired dash pattern and spacings using the Fill and Stroke panel, under Stroke Style. Then run the extension.
Then apply the cut settings etc, as described in the Inkscape Setup section.
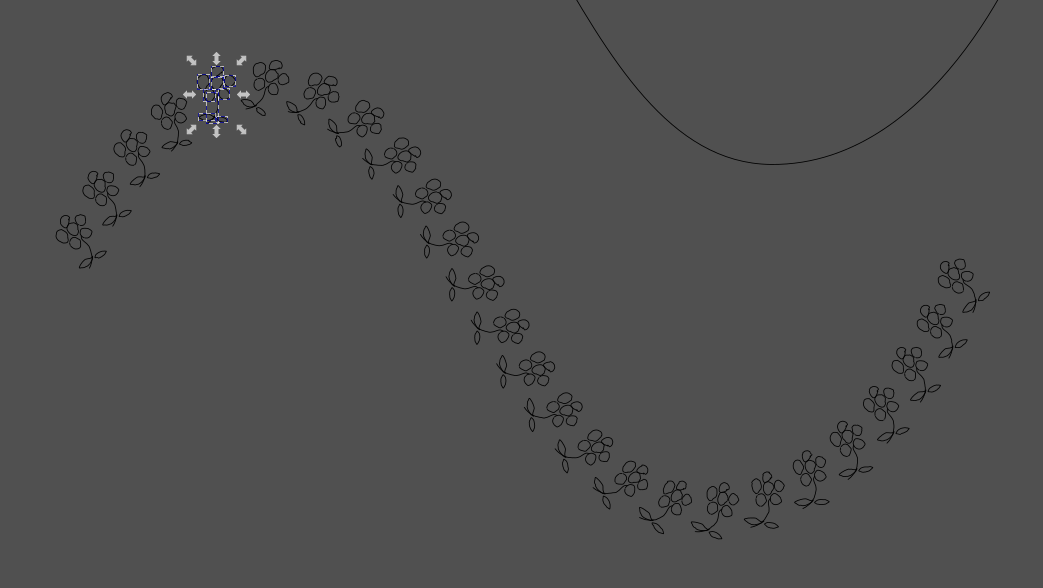
Further Techniques 5: Pattern Along a Path (Inkscape only)
First, I made a Path using the Freehand tool (Shortcut:P).
It is a number of separate lines, combined using Path > Combine in the menu. I don't know if this makes a difference.
Excuse my freehand drawing.
I selected (first) the path to follow, (second) the combined path shape, and then selected the following from the menu:
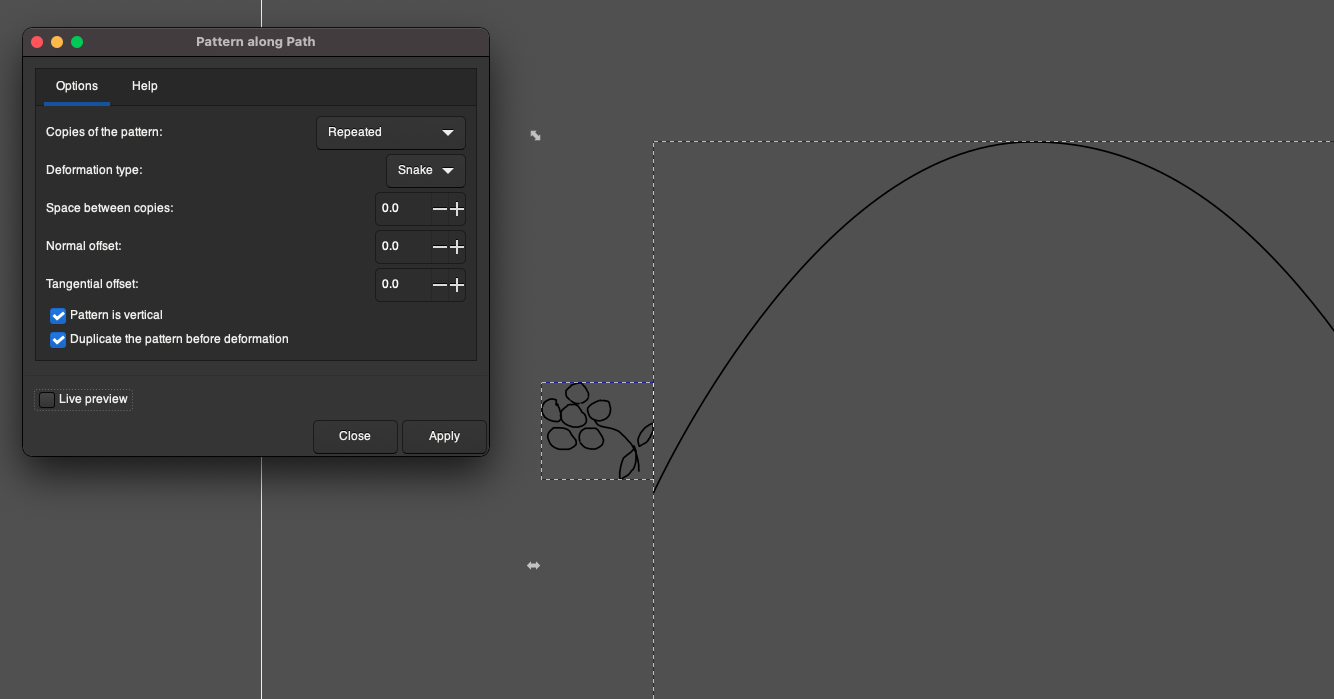
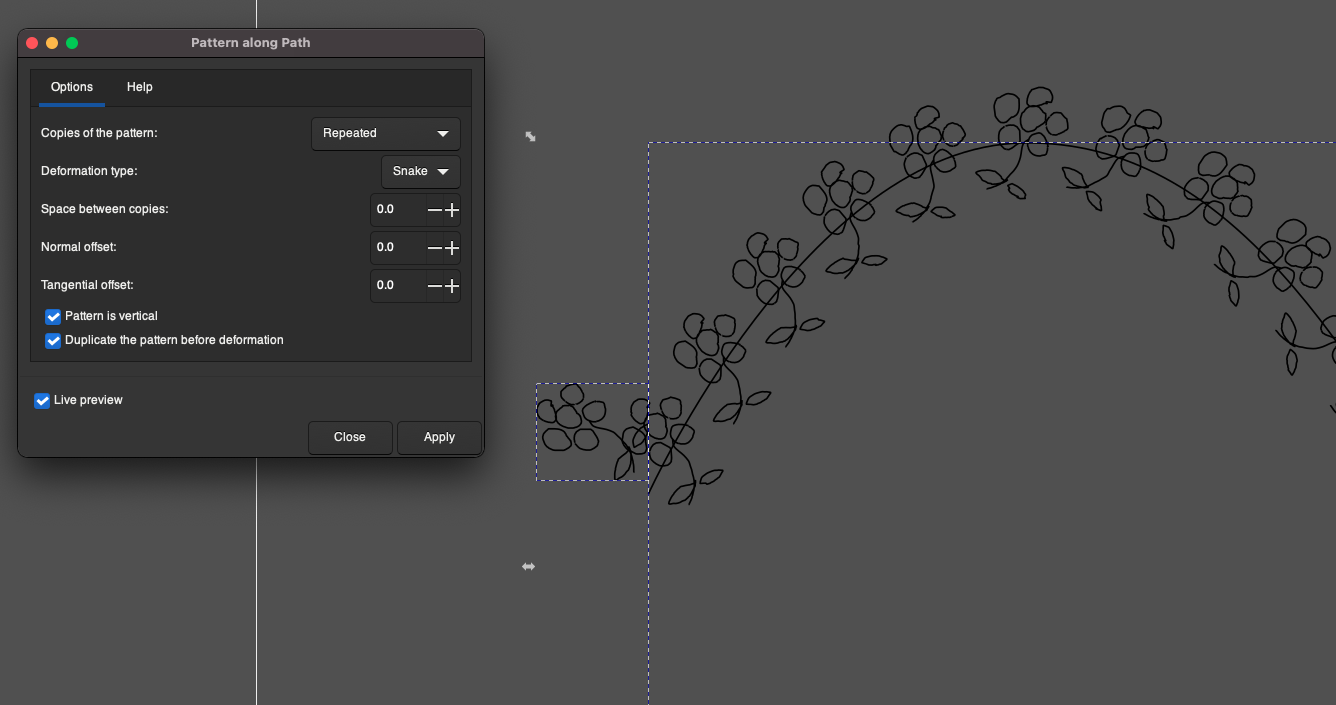
Extensions > Generate Path > Pattern alone Path...
Then Path > Break Apart to simplify the geometry so that you can edit as required.