Setting up PrusaSlicer
v0.3 by Ger Walsh - Sept 2025

PrusaSlicer is an open source slicer software based on Slic3r by Alessandro Ranellucci. PrusaSlicer is frequently updated and contains everything you need to work with Prusa and non-Prusa 3D printers.
PrusaSlicer is available for Windows, Mac, Linux. And even ARM devices and Chromebooks.
You can download it from prusa3d.com - Current version 2.9.3.
When you hit download, wait for the timer to complete. You do not need to make an account, if you would rather not!
Getting Set Up
On first run, you will get a pop-up so that you can configure your printer profiles. Again, a PrusaConnect account is optional here.
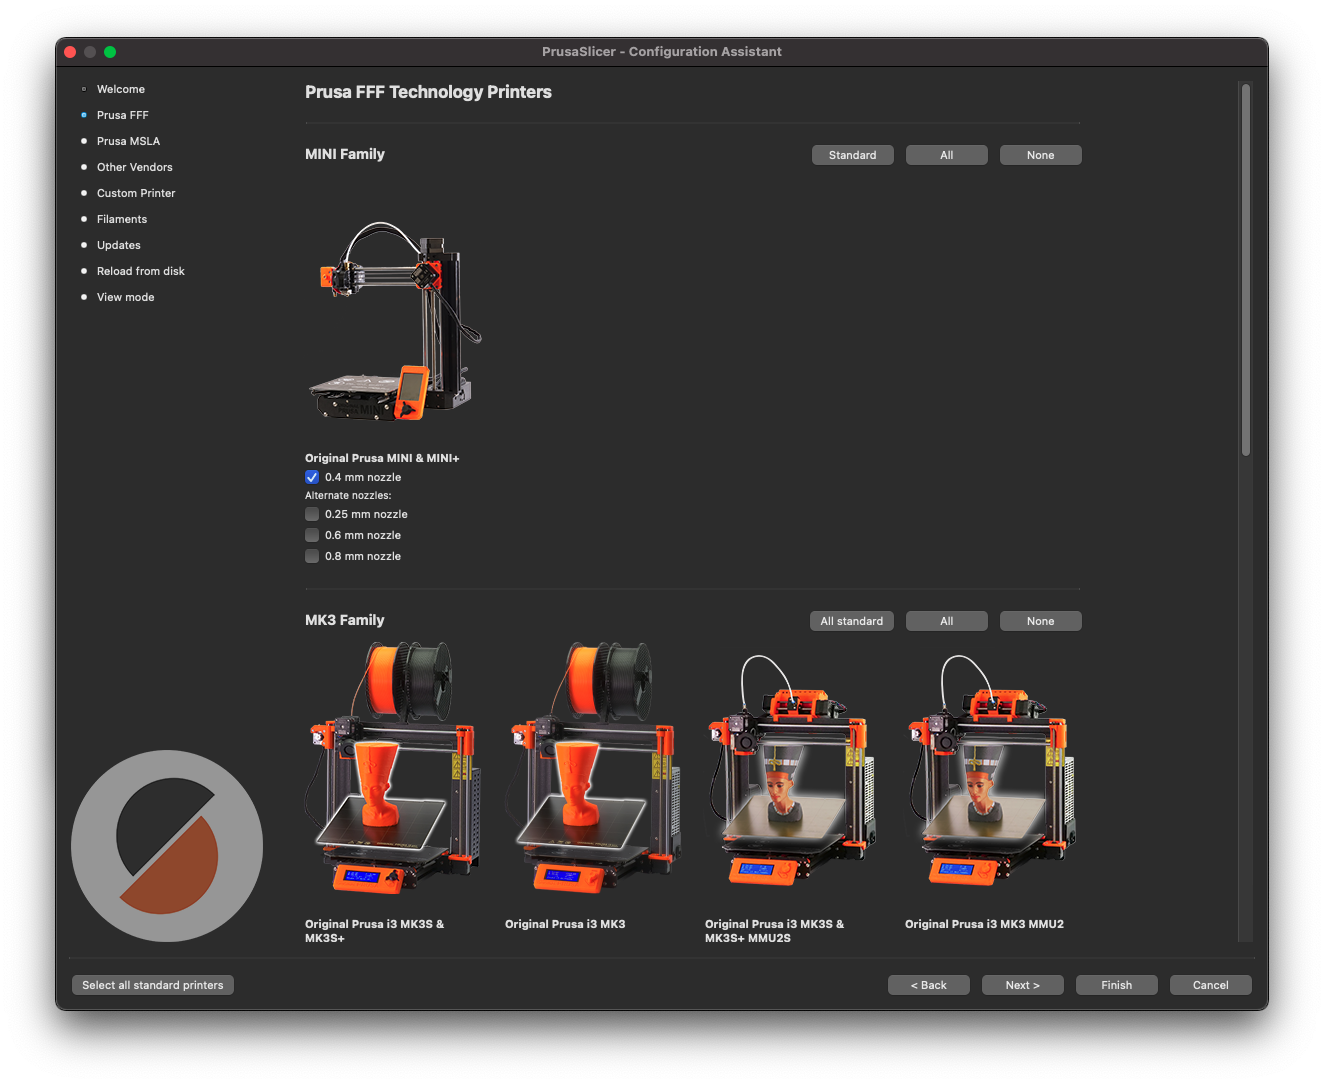
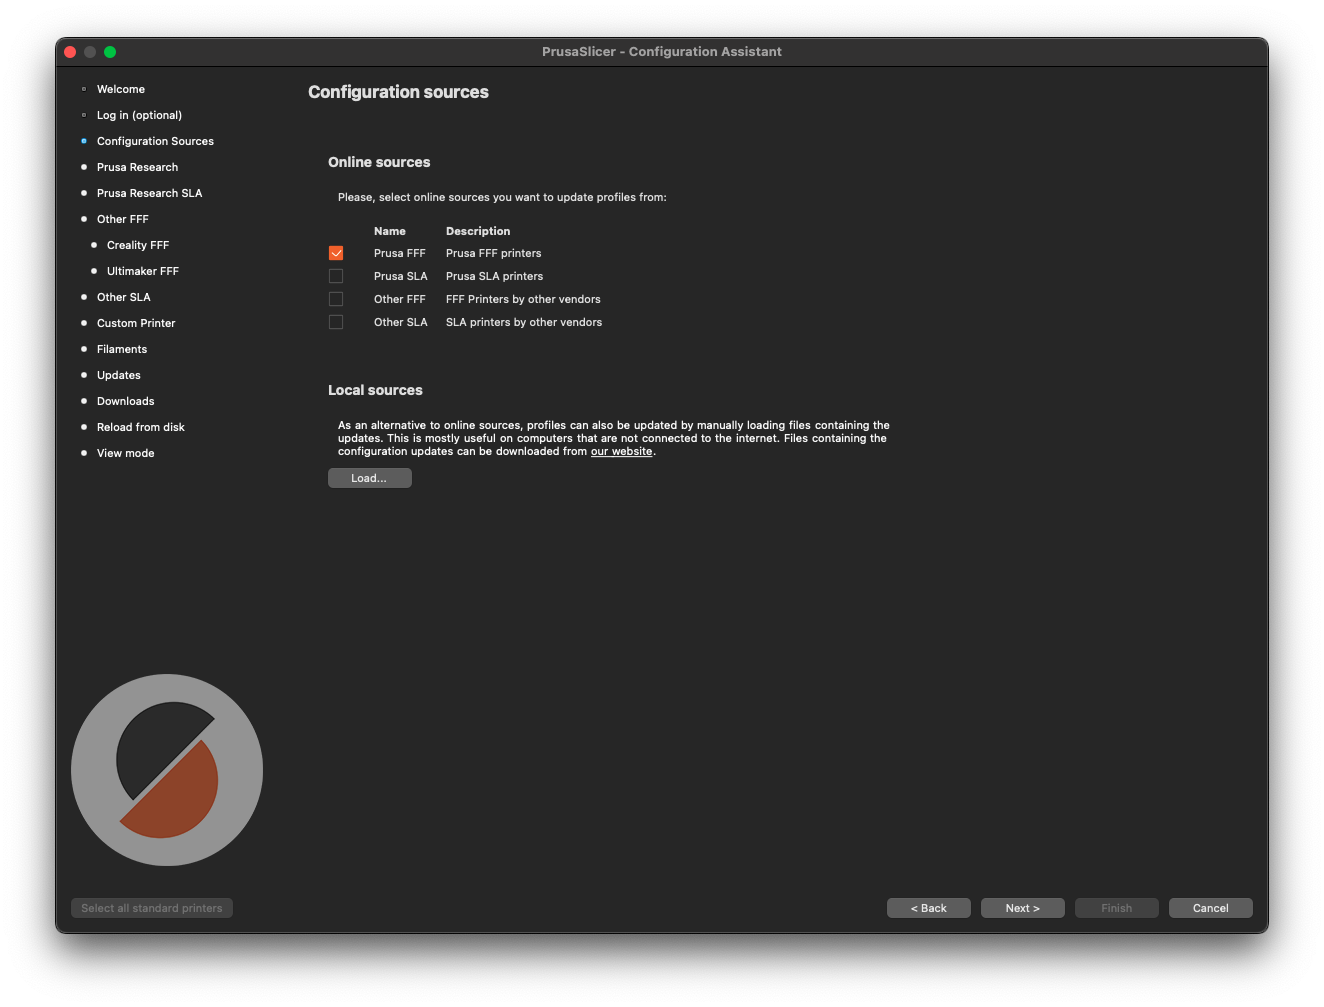
First, confirm which sources to use for machine profiles. (Choose, at least, "Prusa FFF").
Then, you can skip directly to Prusa Research on the list on the left.
These are the printers that you need to select:
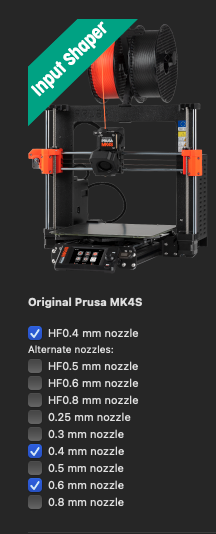
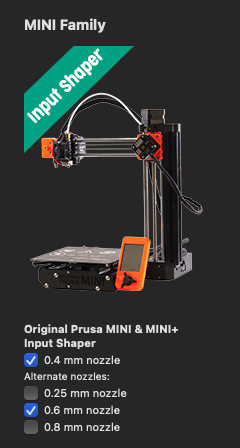
Make sure it's the Mk4S!
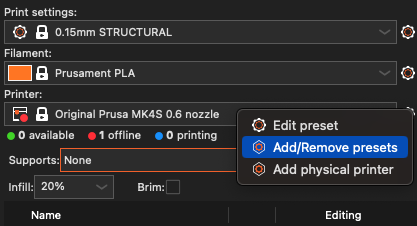
Note: If you need to get back to that set up screen, click on the cog icon beside the Printer dropdown, and go to Add/Remove Presets.
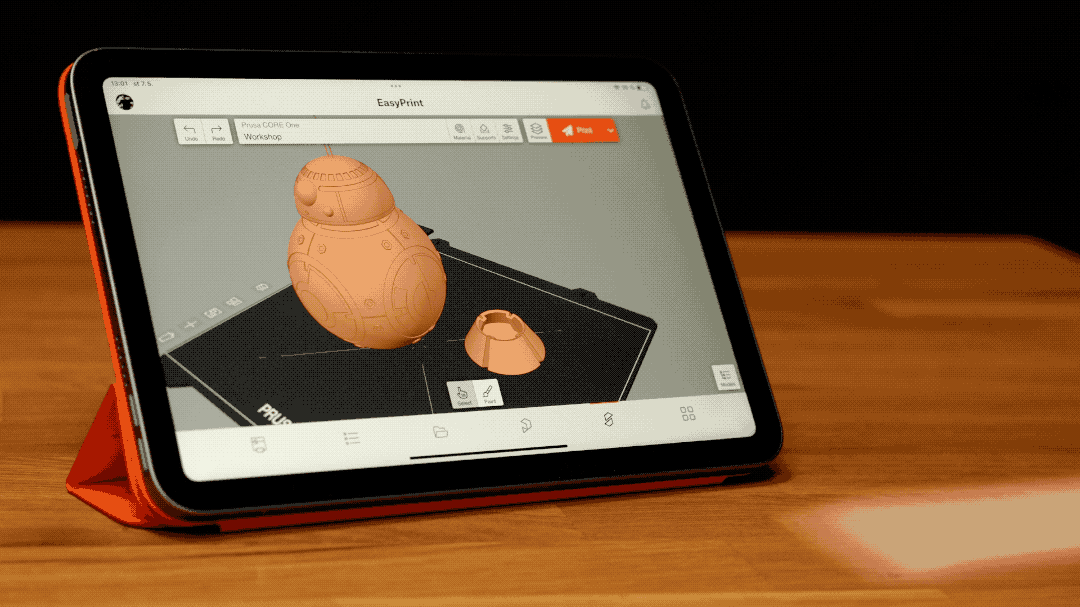
EasyPrint
If you're on a tablet or mobile, also try EasyPrint. You can start it from a model page on Printables.com, or directly. You need a Prusa account (free) and a way to get the file to the printer!
Our Printers are not online. You can export the GCode file, but not send by Wi-Fi (default method on EasyPrint and the Prusa app).
Getting Started
1. Open your Model File.
Click the Model+ icon, top left, or you can drag-and-drop an .STL file from your desktop. You may have more than one on the print bed in the same job.
2. Set up your Model.


With a model selected, the menu that appears on the left-hand-side allows you to position, scale, rotate, lay flat, cut.
Note: Click where it says Beginner mode, and switch to Expert mode to see all settings mentioned here.


Arrange, and Split into Objects, Split into Parts,

There are two icons that allow advanced Paint on Supports, Fuzzy Skin and Seam Painting.
3. Choosing Your Settings.
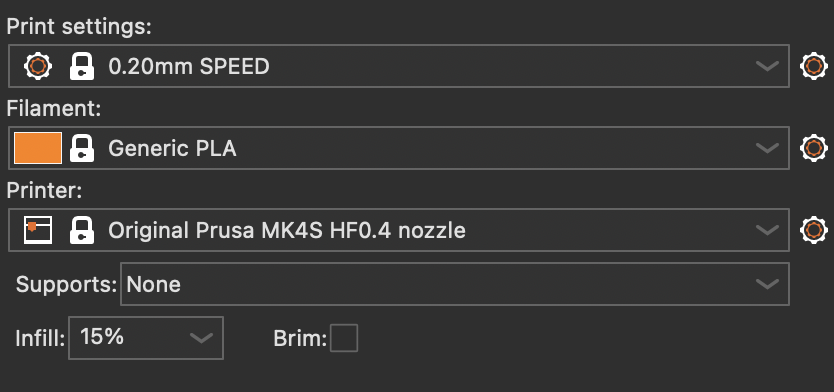
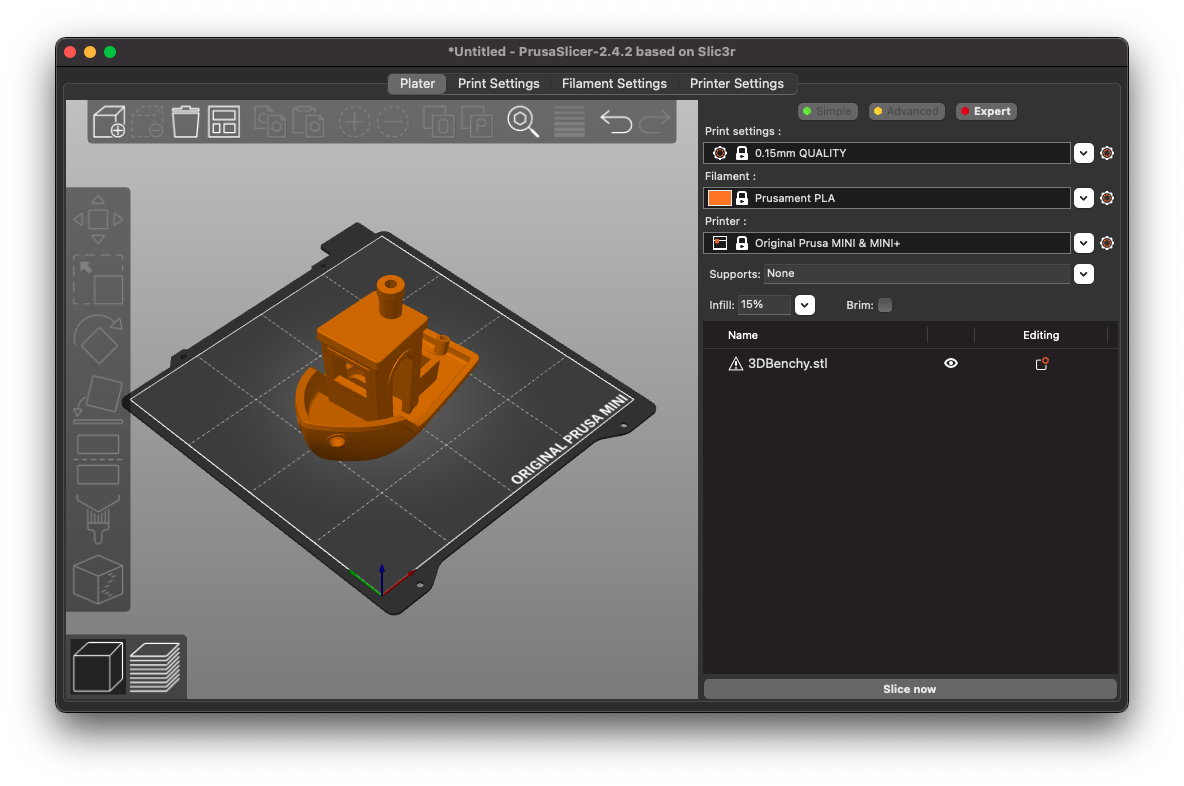
On the right-hand-side panel, the first dropdown selector is "Print Settings". Start with one of the default profiles, like "0.20mm SPEED".
Then select a
Filament, like "Generic PLA", or "PETG". There are many presets for generic materials, and many for specific manufacturers' settings.Also set the "Printer:" dropdown to the printer you intend to use. If you need to add a new machine, jump down to this section.

The bar at the top says Plater | Print Settings | Filament Settings | Printer Settings allows you to navigate back to the original view (Plater). Use the search bar to jump to any setting you can't find.
4. Slice.
Click the Slice Now button on the bottom right of the main screen.
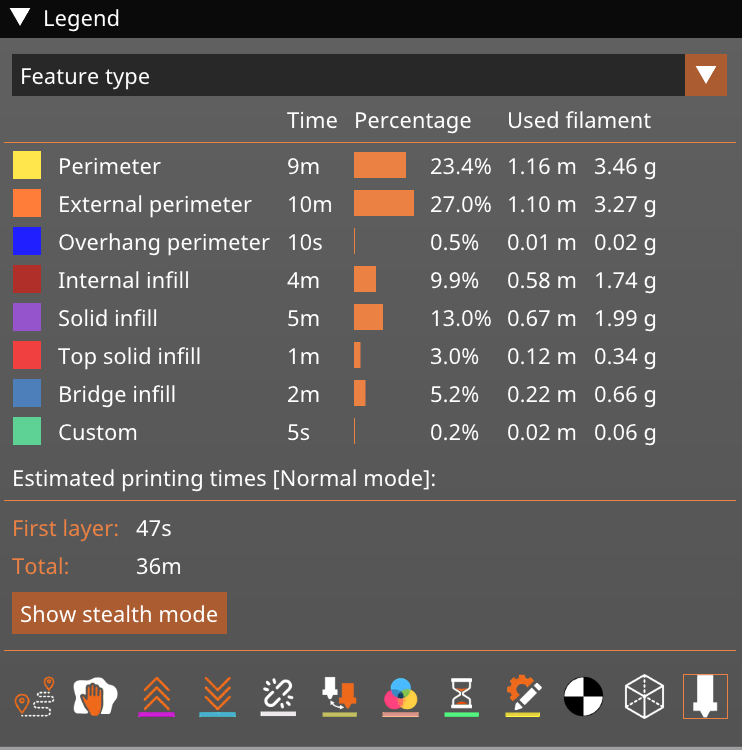
An overlay will show a breakdown of time taken, and how much time is spent on each type of feature, eg. "Internal Infill".
Note that there is a vertical slider on the right that you can move down to look through the layers. If View is set to Feature type, it can help you differentiate support, infill and other lines, matching the colours in the time breakdown.

To go back to edit anything, click the icon bottom left to go from preview to editor.
5. Transfer to the 3D Printer.

Export G-code lets you save your file to your local disk, USB or SD card (if inserted).
Eject!
(Optional) Making Custom Material Presets
On the Configuration Assistant screen, go to Filaments, filter and enable the different profiles.
You can copy a preset to make your own profile, with setting that you want to tweak, or find online.
Use the search box at the top of the main screen to find where settings are that you want to change.
(Optional) Adding Custom Machines
To get back to the Machine Profile screen, click on the cog icon beside the Printer dropdown, and go to Add/Remove Presets.
To add another printer, choose Prusa FFF, Other Vendors or Custom Printer.
If you select Define a Custom Printer, follow the steps to fill in details about the build volume and extruder(s).
Click Finish when done.