V-Carve Pro (v12.5)
v0.3 by Gerard Walsh - Sept '25
Installing
Our CNC uses V-Carve Pro Makerspace License. The MakerSpace Version is linked to ours. You can install it on your own Windows laptop, access all features and use with any of our machines, we just have to set you up.
If you're on Mac, Parallels or Bootcamp will work for you. If you are on Linux, "Wine" might work. (Not tested).
It's easiest not to download a trial version before making an account. You'll be automatically added to the "Fab Lab/University of Limerick" group, and presented the correct version.
- Make your account with the link sent to you.
- Follow these steps:

- Download our tool database here (or through the tool library in the program):
20250617_ShopbotBackup.vtdb (Updated June 2025)
(You don't have to worry about Post-Processors for now).
Finally, to transfer your file to our machine, save it as a .CRV file, onto a USB stick and bring that in. If you can't get it to work, save your vectors (generally .DXF or .SVG) and you will need to reassign your toolpaths on our machine.
General
VCarve Pro is a CAD/CAM software for use with Fab Lab's ShopBot router and others. It is developed by Vectric.
CAD/CAM (computer-aided design and computer-aided manufacturing) refers to computer software that is used to both design and manufacture products. CAD is the use of computer technology for design and design documentation.
V-Carve Pro allows you to convert a vector drawing to "toolpaths", by assigning the parameters and specifications of the machine.
You will export a G-Code file (.SBC format, in this case), that may have multiple tool operations in it. Meaning that there can be pauses in the job that would allow you to do a tool change, etc. You can also export only certain toolpaths from a file, giving you a full stop if you'd rather.
Steps
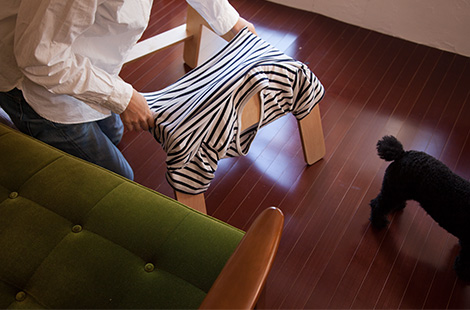
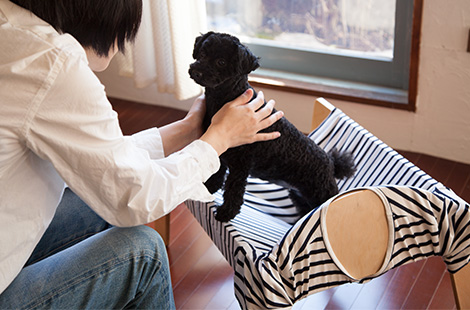
* By the way, in the following steps, I'll be using the WANMOCK by Torafu Architects which is designed for a Jack Russell Terrier. This design, and indeed many others, are available for download or purchase on https://architecturefordogs.com
1. Setting Up
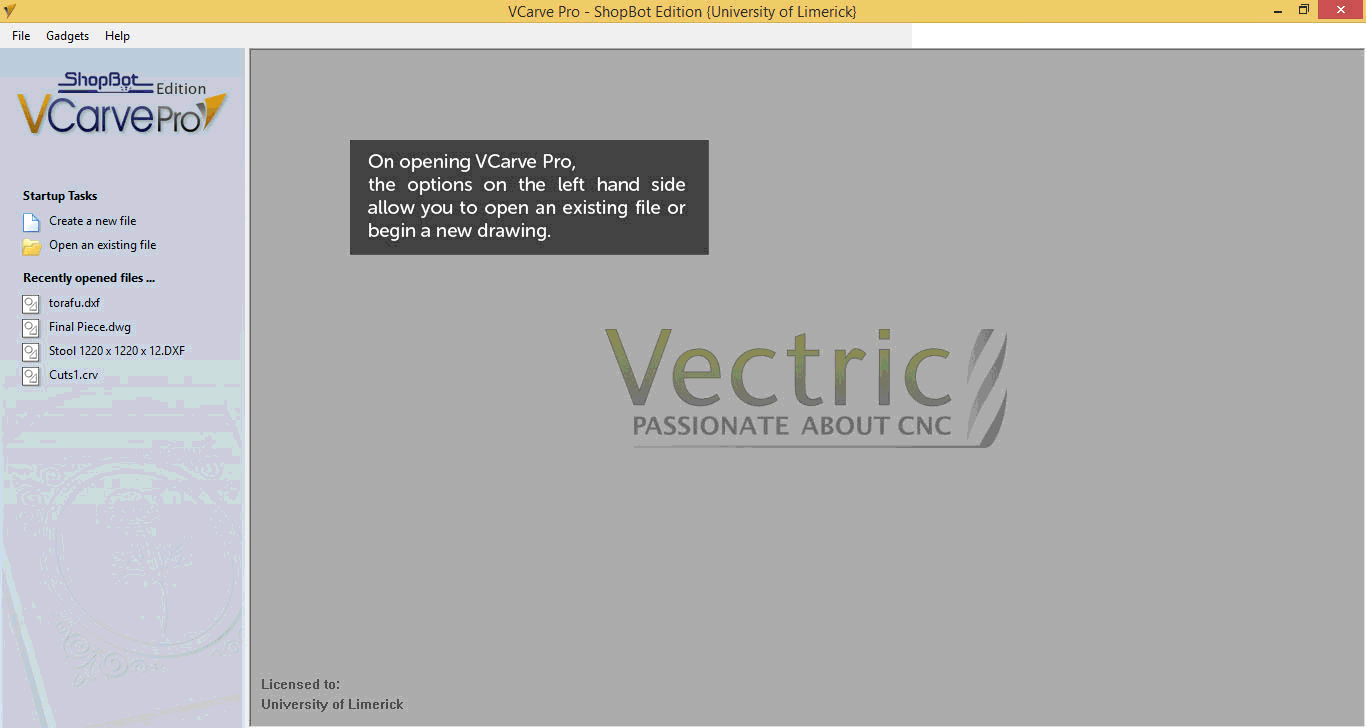
Open the V-Carve Software. It's the one with the "![]() " logo.
" logo.
Click Open an Existing File, and choose the file in the dialogue box. Enter the settings in the Job Setup screen:
If you choose 'Create a new file', you will see the same set up, and then a blank workspace. You can always use File > Import Vectors to add your designs anyway.
The default setup is as follows:
| Job Size, Width (x) | 2440 mm |
| Job Size, Height (y) | 1220 mm |
| Material Thickness | 18 mm, for example |
| Offset | Unchecked* |
| XY Datum Position** | Bottom-left |
| Units | Millimeters |
| Scale Design with job size? | No |
* Your offset is important. While possible to set a smaller job size and offset it from the machine origin, we set the size above for a full sheet. If you import a .DXF from AutoCAD, it will automatically enable this option according to the World Origin in AutoCAD. It's safer to disable this option now.
** Make sure that the XY Datum position is set to the bottom left as shown. That is how our machine is set up. Compare to the example above.
When set up, click OK.
2. V-Carve Basics
In general, the layout of V-Carve is as follows. Tools for editing or modifying your drawing are located on the left, and tools for the making of toolpaths are on the right-hand-side (hidden by default - just hover your mouse over where it says "Toolpaths").
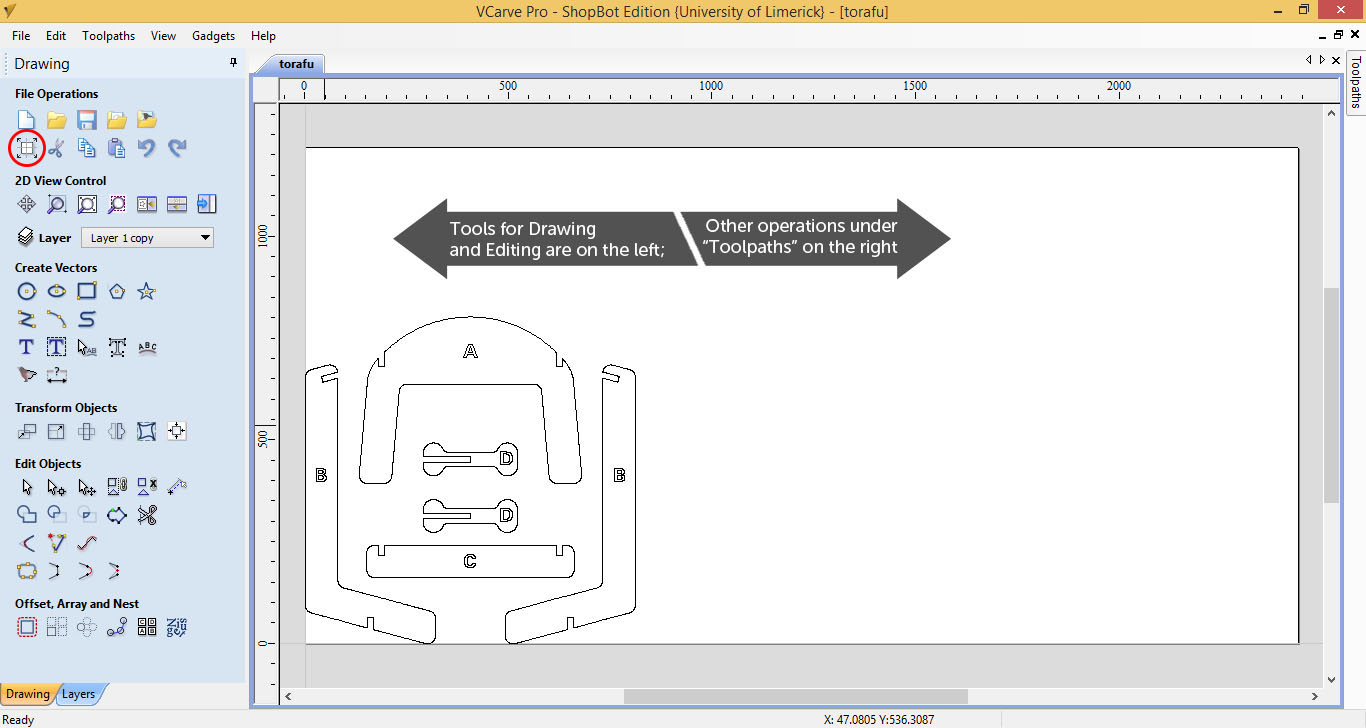
There are many drawing tools in V-Carve Pro, from basic to advanced, including drawing of shapes, lines, text, preforming offsets, translation/rotation, nesting, bitmap tracing and 3D model handling. Hover your mouse over the tools to see what they do. For now, we are going to set up our drawing on our 2440 x 1220 job area, with a 30mm margin at the edge, then we are going to select lines (closed polylines are preferred), and apply toolpaths on the right-hand panel. It's hidden by default, just hover over where it says "Toolpaths" to expand it.
3. Assigning Toolpaths
- Type of Toolpath:
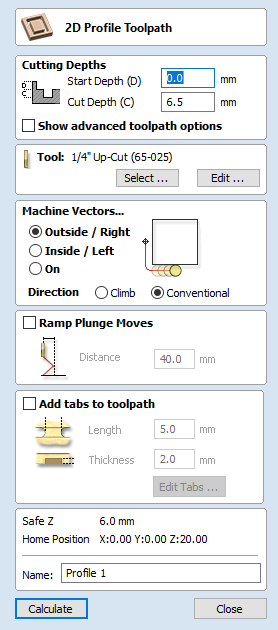 Profile
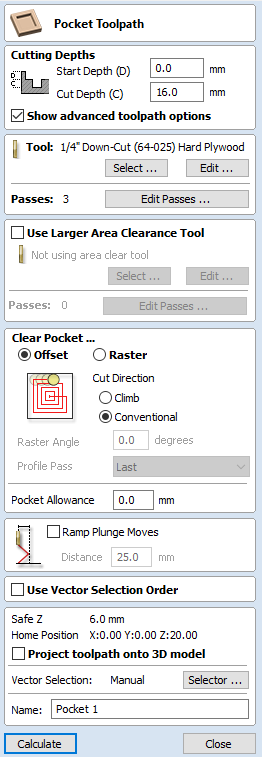 Pocket
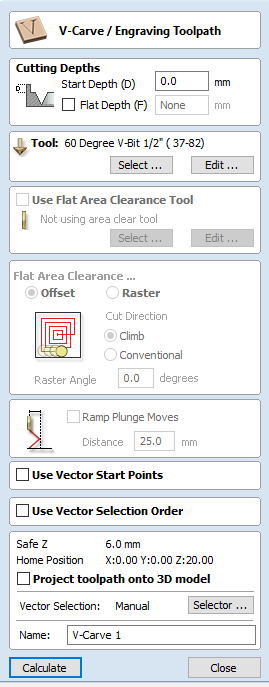 V-Carve
 Drill Holes
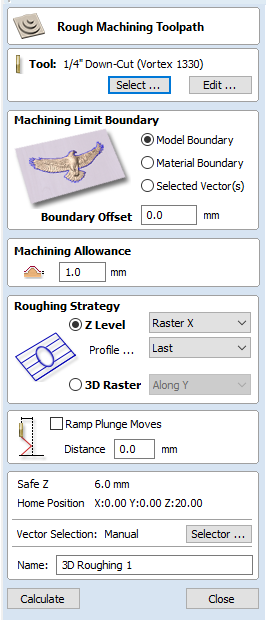 Roughing (3D),
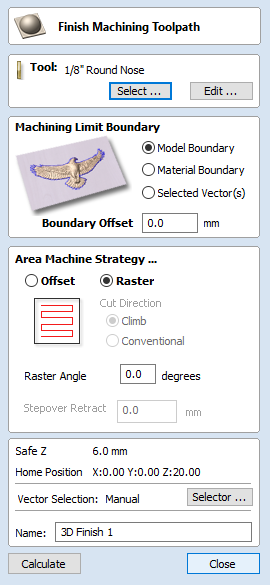 Finishing (3D)
Start Depth / Cut Depth.
Tool - chosen preset from tool database.
Particular options related to the type of toolpath:
- Alignment (Inside/Outside/On),
- Direction (Climb or Conventional), and Ramping,
- Clearance or Roughing/Finishing Strategy (Offset, Raster, 3D Raster along Y direction),
- Clearance Tool (A second, bigger, tool to help clear large areas more efficiently),
- Pecking and Dwelling (to do with Drilling paths),
- Boundary Limit (Clips down 3D layers to avoid problems at the edge).
- Tabs. Tabs are breaks in profiles or 3D work so that nothing moves around while you work.
Other Settings
Material Dimensions, Safe Height, Origin/Offset are set on a per-file basis. Set these when you open a new file, or by clicking this icon,  , on your tool pallet (top left).
4. Adding Fillets (optional)
Internal Corners - due to the thickness of the bits we are using - are rounded by the same diameter. If we need to fit material together, a fillet, an extra notch taken out by the CNC, can remove material in a way to help.
The Fillet Tool gives us 3 alternatives:
- A "Dog-Bone" Fillet,
- a "T-Bone" Fillet,
- or a "Plasma/Drag Knife" Fillet*
* The "Plasma/Drag Knife" Fillet is not for use with the Shopbot, but the first two are easily implemented solutions and avoid a lot of sanding or finishing to cut fitting parts on the CNC directly.
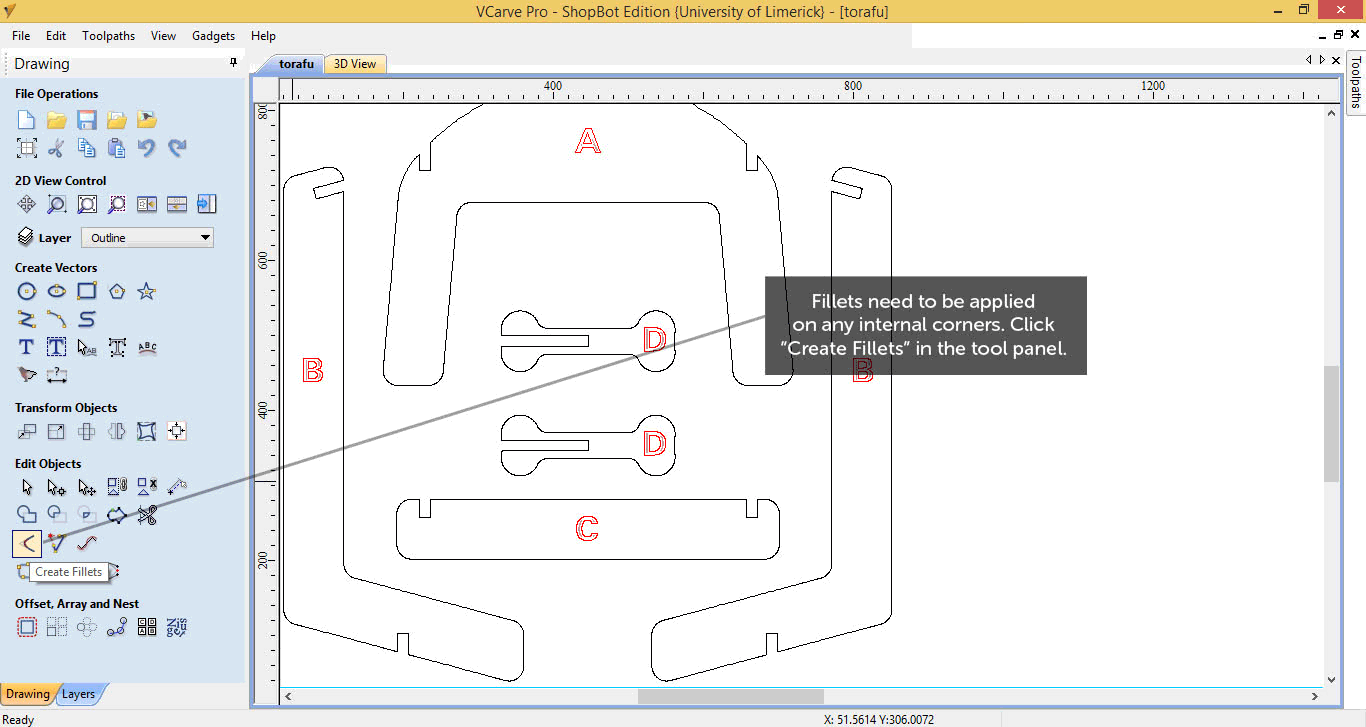
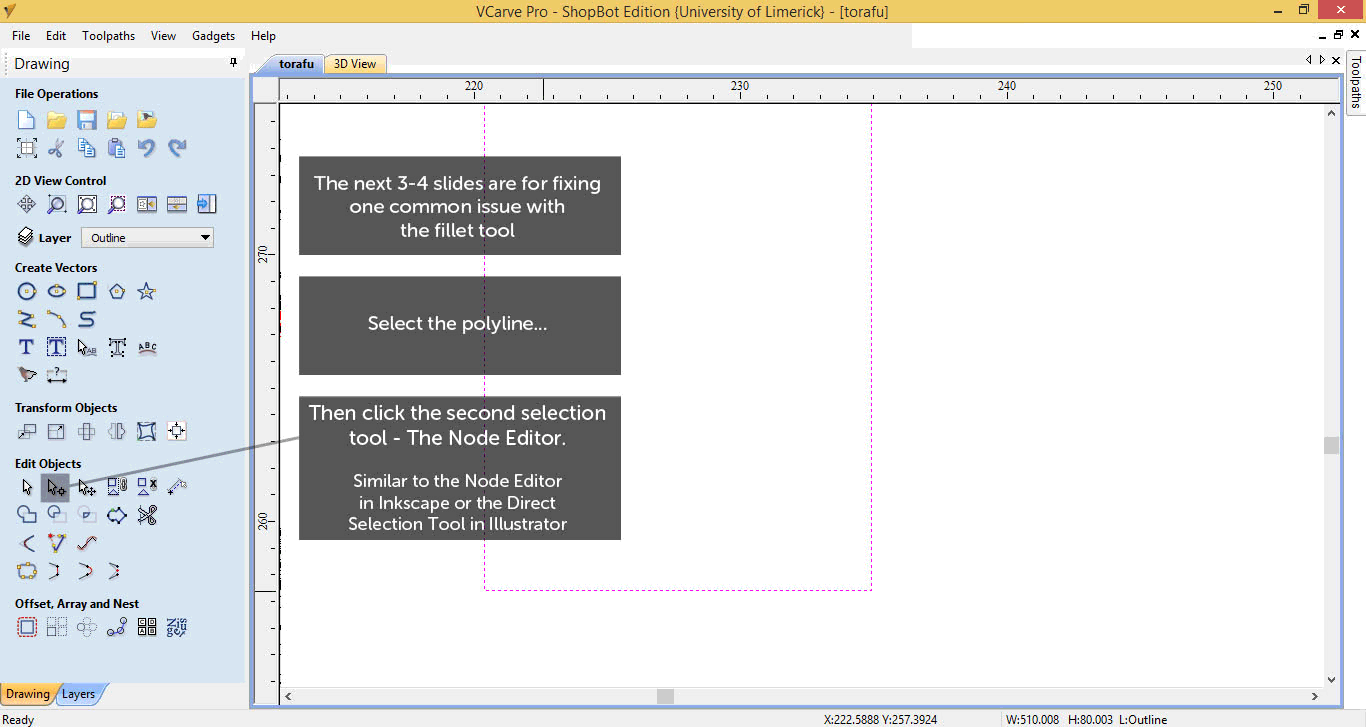
In the case of the Fillet Tool not working with the selected geometry, check the PolyLine with the Node Editor (It's the second mouse selection tool under Edit Objects). As you see below, there might be a lot of nodes or anchors describing a straight line, which keeps the fillet tool from being able to identify the corner properly. You can also use the Node Editor to remove the superfluous points, and allow the fillet to be added.
Note: When you make changes to any geometry (scale, position, node change etc.), or toolpath setting, you should recalculate your toolpaths! It'll be done by clicking `Calculate` in the toolpath dialogue, or right-clicking on one of the toolpaths and going to `Recalculate > All`.